I enjoy growing flowers, herbs, vegetables, and fruit, but my favorite yearly project is always my fairy garden. One year, I was installing solar twinkle lights over an arbor and I thought it might be pretty if I could do the same to the arbor in my fairy garden.
PREPARATION
Here is a list of the materials you need
Large container with drainage holes (e.g., half whisky barrel, wheelbarrow, tub)
Potting soil with fertilizer
Drip irrigation kit (optional)
Structures (e.g., arbor, gazebo, house)
Decorative elements (e.g., ponds, birdbath, furniture, fencing,
Decorative stakes that add height like an oversized solar moon, weathervane or a birdhouse
Plants
Garden staples
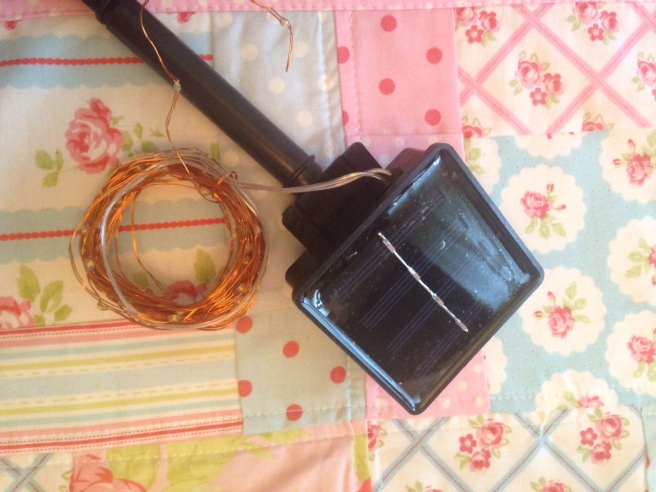
I initially started with solar lights that looked a lot like the lights you might use at Christmas. However, I later switched to these solar LED wire string lights and they have been going strong for months now. I actually have found all kinds of garden uses for these and even have some inside some windows in my house to brighten things up when the sun goes down early in the winter. I especially love these pink solar lights that intermingle with my culinary herbs inside my kitchen window.
The ones that I bought had 100 lights on the string. That may seem like a lot, but I thought it was just right. Here is what they look like when they first arrive:
Once you have all of your materials, fill the container with potting soil until it is just a few inches below the top. You will fill it to the top later when you are almost done. Lay out all of the larger structures and plants until you have a general idea of where you want everything to be. You will then need to move some items in and out while you install the irrigation and lighting.
IRRIGATION
It is not required, but if you live somewhere hot and dry like me, you might need to water as much as twice a day unless you are using a drip system. I use drip irrigation on a timer for all of my containers, and I first started with a Drip Irrigation Kit for Containers which are quite easy to use. This kit would water several containers, not just your fairy garden. For more information about drip irrigation, please see The Beginner’s Guide to Using Drip Irrigation in your Container Garden.
With that said, drip irrigation is a must if you want to successfully grow plants in miniature containers like these in a hot climate. I insert an emitter directly into the bottom of the planters and urns. This takes some fiddling around to get it right. I also arrange one emitter such that it will drip into the little pond and therefore stay full of water all summer. Garden staples are helpful in getting the drip irrigation installed if you want to do some of these extras. For more information on this, see 6 Creative Uses for Drip Irrigation .
LIGHTING
Install the solar string lights starting at the end nearest the solar panel. Unfortunately, the lights are kind of far apart, so it is sometimes necessary to twist or loop the wire around so that the lights are closer together. I like using the lights in a way that you cannot see a continuous string of lights. Instead, some are hidden under plants or gravel such that the lighting appears to start and stop in different places. This year, I added solar light strings over a “patio”, which is really an old mosaic stepping stone.
When I’m done, any leftover lights are placed in the house so it looks like the fairies are at home.
PLANTING
Place your plants a little above the soil line, remember that you will add the rest of the soil later.
I especially like alyssum (pink) and lobelia (bright blue) because I can buy them quite reasonably at a flat sale every year. These light blue ageratum are also nice, but only when they are planted towards the very back because they get tall.

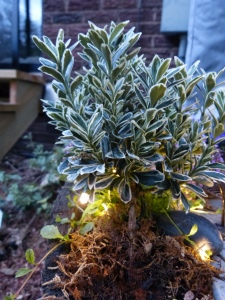
Some kind of miniature tree is also a nice addition. My favorite is this mini variegated olive.
I use Wire Vine over the arbor (left) and Isotoma Laurentia (right) which has tiny little blue flowers. These two plants are great because they often come back after a mild winter.
If you want a vegetable garden, simply break the tips off the branches of succulents and place them in the soil to mimic tiny cabbages. They will eventually take root, needing only a little water.

Lastly, I use some premium annuals such as Baby’s Tears (left) or Leptinella (center) which looks like tiny fern plants. I also like Irish moss (right) because it looks so much like grass.
To learn more about fairy garden plants, visit fairygardening.com
DECORATE
Once the plants are planted, add a couple inches of soil to the top covering the drip irrigation and solar lighting. Add some rocks for decorations or paths. Here is a path made of expanded shale.

Add fun little extras (e.g., furniture, fencing, decorative stakes, etc). I have a lot of trouble restraining myself on this step. I really tend to junk it up! For me, that is part of the fun.
MAINTAIN
Keep the garden watered and cut plants back by half when they get tall or scraggly, which is what happened here..

I hope that you enjoy creating your own magical fairy garden!


Hi! I am currently writing an article for BHG.com about fairy gardens and would love to include this one. Shoot me an email ASAP if you are interested in this. Thanks so much!
LikeLike
Hi Kenda,
I’m writing a story about fairy gardens for floriology magazine, and we would love to include these images in the publication, with your permission. Of course, we would provide photo credit. If this interests you, please send me an email at your earliest convenience.
Best,
Casey
LikeLike
what is the pond made of
LikeLike
Hi, I don’t know, actually. It is a shallow, straight-edged bowl that I bought somewhere like Joanne’s or Michael’s. I then added some white gravel to it. Sorry to not be more help!
LikeLike
I loved all of your Beautiful mini garden it great thanks for showing it God Bless ❤️❤️❤️💚💚💕💕
LikeLike
What an amazing looking fairy garden ! Wow absolutely stunning love it 😊😊
LikeLike