Buttercream Christmas Sugar Cookies

If you want the most beautiful cookies with a clean edge and smooth surface, you need to be looking into Royal icing. But for flavor, nothing beats buttercream. Unfortunately, that can be a challenge when you want cookies both beautiful and delicious AND you only make sugar cookies once a year, so you don’t get a lot of practice making and using icing.

It is best to use an icing recipe that will crust a bit on the surface so that your cookies can be stacked, but the icing should still be relatively soft to have a pleasant texture. If you need such a recipe, please see my recipe for buttercream cookie icing.

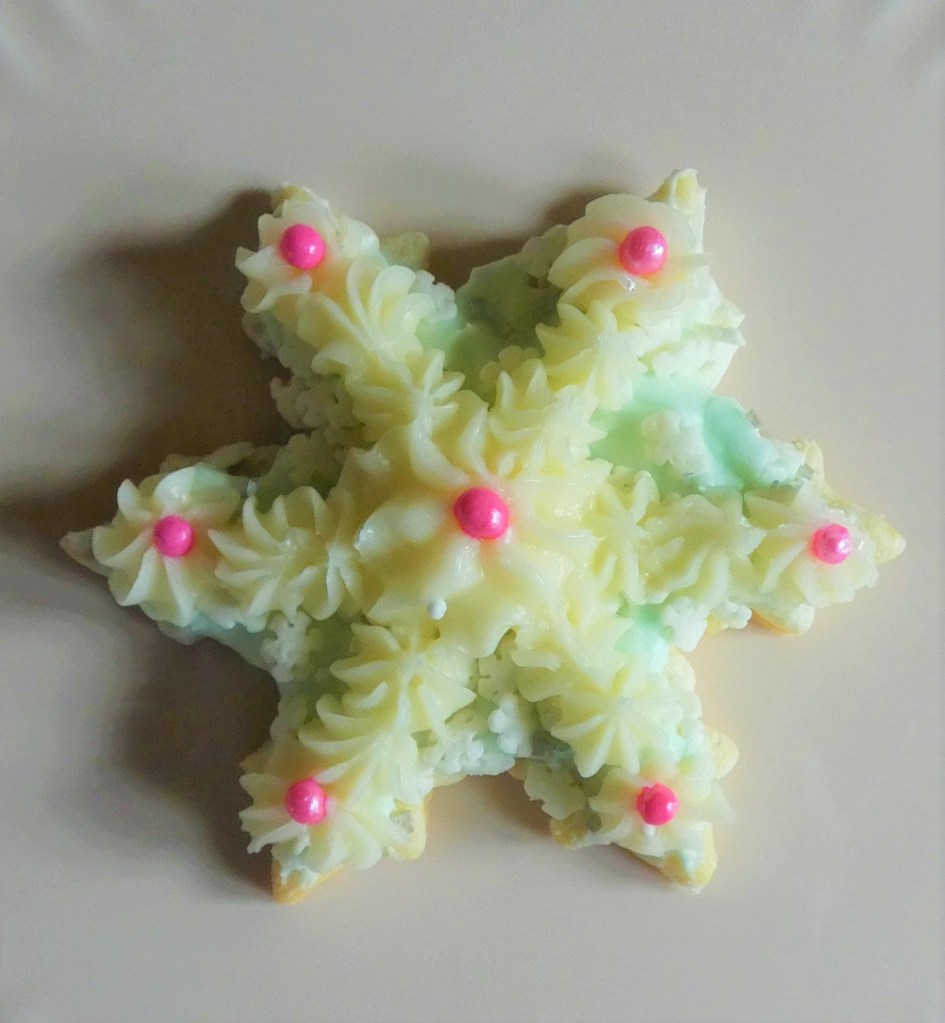
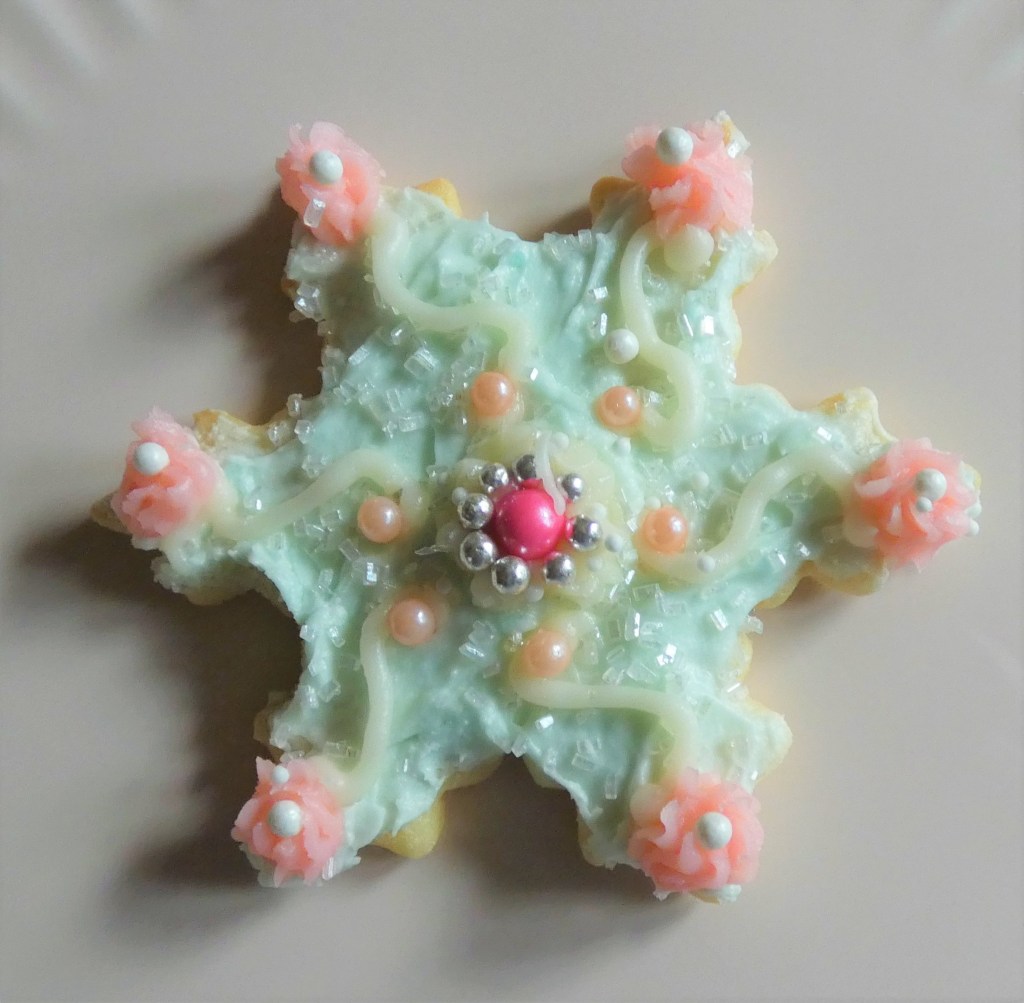
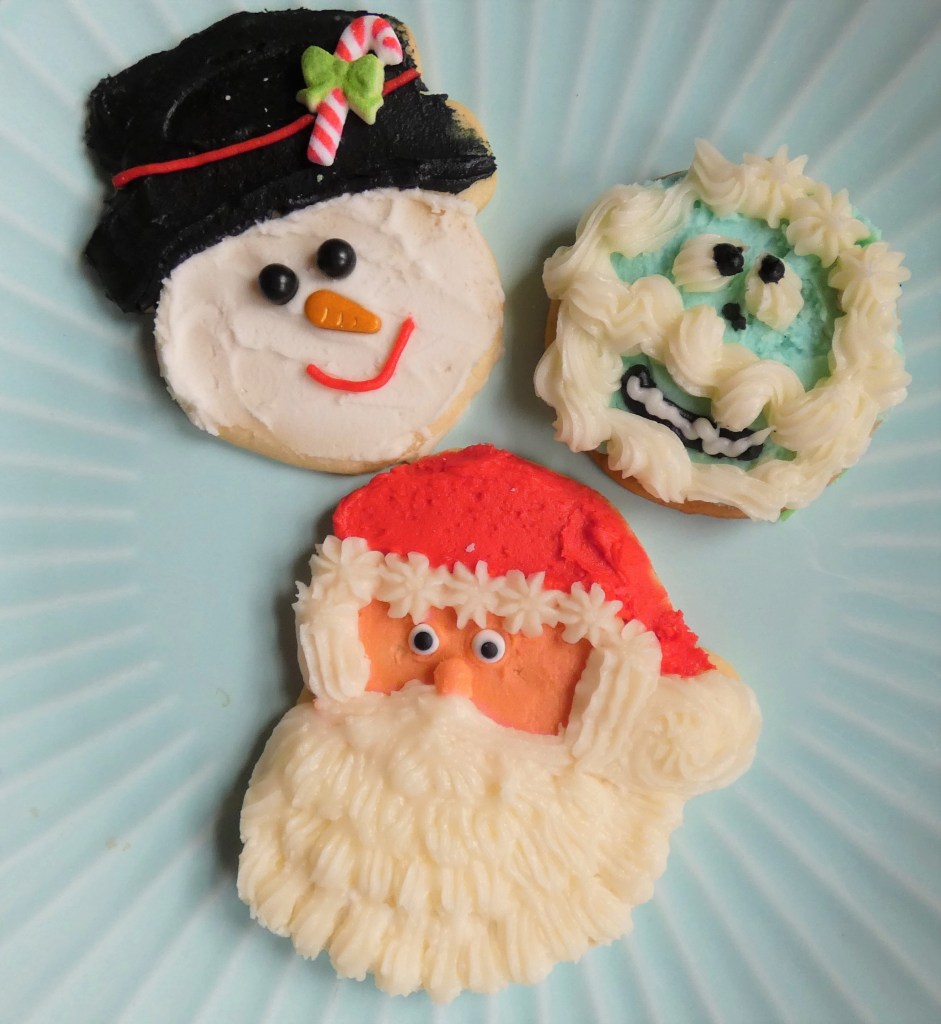
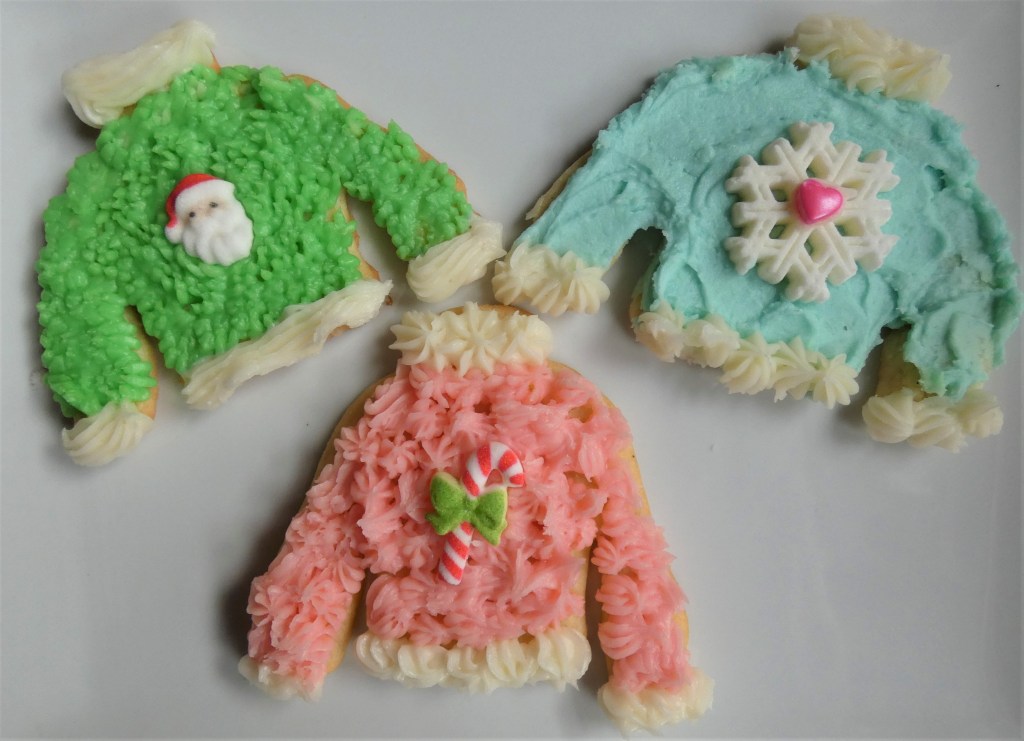
Next, please see the following images for Christmas cookies decorated with buttercream. Many also have decorations found on Amazon and Etsy.

Frosty, Abominable Snowman, Santa For Frosty, carefully spread the white frosting on before the black. Be careful that the black and write frosting do not touch. Frosty is a nice design if you do not having any piping tools as you can place some red frosting in a sandwich bag and cut a little off the corner to pipe.
Sweaters primarily used star tips, but the green one used a grass tip. This tip has proved versatile when creating wreaths, trees, window boxes, and sweaters.

Snowglobes. The main thing I would do differently with these snowglobes would be not trying to pipe around the edges as this made them look much messier. Snowglobes are definitely an area where I have a lot of room to improve!
Ornaments
Advertisement

Easy Santa Cookies without Piping Tools

Would you like to step up your sugar cookie game, but don’t want to buy or use a piping bag and tips? Are you also disgusted by the taste of Royal icing, preferring a tasty buttercream instead? These Santa cookies can be decorated with buttercream icing and the only tools necessary are cookie cutters, plastic sandwich bags, and some easy-to-find eyes.

To make these Santa cookies, I started with this large Santa cookie cutter.

I made my favorite sugar cookie recipe with the cookie cutters.

Next, I made buttercream icing and colored small portions red and flesh colored to match the photos above.

Then, the fun part started!

Spread the three different colors of icing to match the photos above. Avoid allowing the different colors to touch.

Decorate the faces by pressing the eyes into the frosting. This gives Santa a more natural look. Roll up a small ball of the flesh frosting for a nose.

Fill a plastic sandwich-sized or larger bag with some white frosting.

Cut off the tip, twist the top to remove as much air as possible.

Use icing to pipe on the edge of the hat, the ball at the end, sideburns and mustache. If you love a lot of icing, you could even use pipe on the beard.

If the icing seems to soft, put it back in the fridge for 10-15 minutes.

If you do have a piping bag and star tip, the results look a little fancier, but either cookie is clearly Santa!

Some posts on this site include affiliate links. If you click on a link and make a purchase, we may earn a small commission at no extra cost to you. Please know that the opinions expressed are entirely our own.

Buttercream Cookie Icing

I love this icing for a few different reasons:

  • Unlike Royal icing, it tastes great!
  • It can be piped and spread.
  • It doesn’t require any messy measuring of powdered sugar
  • It keeps well in the refrigerator for up to two weeks
  • Almond extract is absolutely essential to tasty sugar cookies

”Buttercream.Cookie.Icing”

  • Servings: ”24-48″
  • Difficulty: ”easy”
  • Print

This recipe is versatile allowing easy spreading and piping. It is very sweet, so add a pinch or more of salt if you do not like sweeter icings.

Ingredients

  • 2 pound package powdered sugar
  • 2 sticks room temperature unsalted butter
  • 1 tsp almond or vanilla extract
  • 3/4 cup whole milk, half-and-half or cream

Directions

1. Whip the butter using an electric mixer for minute or two.

2. Place bowl in sink and carefully add powdered sugar, extract and about 1/4 cup of cream.

3. Mix on low until powdered sugar is incorporated. Gradually add more cream or milk until no powdered sugar is visible Scrape with a spatula.

4. Turn mixer up to high and whip, adding additional milk or cream until desired consistency. Peaks should hold their shape.

5. Add to bowls to color icing, then add to piping bags as needed.

6. To store, place clear plastic film directly on icing in bowls and cover with a fitted lid. The tips of piping can be covered with plastic film and bags stored in zippered bags. Frosting will keep up to two weeks.