If you want the most beautiful cookies with a clean edge and smooth surface, you need to be looking into Royal icing. But for flavor, nothing beats buttercream. Unfortunately, that can be a challenge when you want cookies both beautiful and delicious AND you only make sugar cookies once a year, so you don’t get a lot of practice making and using icing.
It is best to use an icing recipe that will crust a bit on the surface so that your cookies can be stacked, but the icing should still be relatively soft to have a pleasant texture. If you need such a recipe, please see my recipe for buttercream cookie icing.
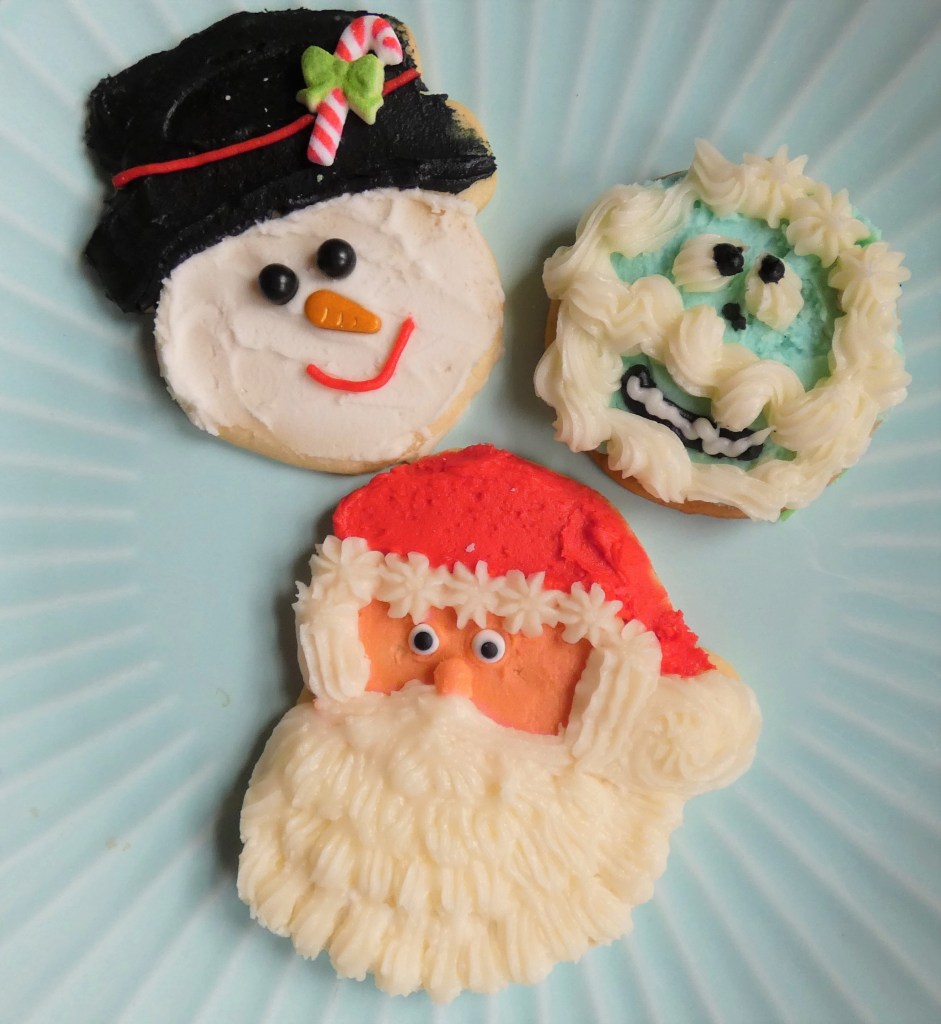
Next, please see the following images for Christmas cookies decorated with buttercream. Many also have decorations found on Amazon and Etsy.
Frosty, Abominable Snowman, Santa For Frosty, carefully spread the white frosting on before the black. Be careful that the black and write frosting do not touch. Frosty is a nice design if you do not having any piping tools as you can place some red frosting in a sandwich bag and cut a little off the corner to pipe. Sweaters primarily used star tips, but the green one used a grass tip. This tip has proved versatile when creating wreaths, trees, window boxes, and sweaters. Snowglobes. The main thing I would do differently with these snowglobes would be not trying to pipe around the edges as this made them look much messier. Snowglobes are definitely an area where I have a lot of room to improve!OrnamentsSnowflakes. For these snowflakes, cookies were dipped in thinned icing or icing was carefully spread thinly on top. Sparkling sugar or sprinkles that looked like snow or snowflakes were then sprinkled on top. Next, icing was piped on with a star or plain tip. Finally, silver dragees or sugar pearls were placed on with tweezers.
hat and face icing do not touch press eyes, roll nose ballAdd beard icing piped on with sandwich bagpiping with bag and star tipStep-by-Step Santa Cookies
Would you like to step up your sugar cookie game, but don’t want to buy or use a piping bag and tips? Are you also disgusted by the taste of Royal icing, preferring a tasty buttercream instead? These Santa cookies can be decorated with buttercream icing and the only tools necessary are cookie cutters, plastic sandwich bags, and some easy-to-find eyes.
I made my favorite sugar cookie recipe with the cookie cutters.
Next, I made buttercream icing and colored small portions red and flesh colored to match the photos above.
Then, the fun part started!
Spread the three different colors of icing to match the photos above. Avoid allowing the different colors to touch.
Decorate the faces by pressing the eyes into the frosting. This gives Santa a more natural look. Roll up a small ball of the flesh frosting for a nose.
Fill a plastic sandwich-sized or larger bag with some white frosting.
Cut off the tip, twist the top to remove as much air as possible.
Use icing to pipe on the edge of the hat, the ball at the end, sideburns and mustache. If you love a lot of icing, you could even use pipe on the beard.
If the icing seems to soft, put it back in the fridge for 10-15 minutes.
If you do have a piping bag and star tip, the results look a little fancier, but either cookie is clearly Santa!
Some posts on this site include affiliate links. If you click on a link and make a purchase, we may earn a small commission at no extra cost to you. Please know that the opinions expressed are entirely our own.
This recipe is versatile allowing easy spreading and piping. It is very sweet, so add a pinch or more of salt if you do not like sweeter icings.
Ingredients
2 pound package powdered sugar
2 sticks room temperature unsalted butter
1 tsp almond or vanilla extract
3/4 cup whole milk, half-and-half or cream
Directions
1. Whip the butter using an electric mixer for minute or two.
2. Place bowl in sink and carefully add powdered sugar, extract and about 1/4 cup of cream.
3. Mix on low until powdered sugar is incorporated. Gradually add more cream or milk until no powdered sugar is visible Scrape with a spatula.
4. Turn mixer up to high and whip, adding additional milk or cream until desired consistency. Peaks should hold their shape.
5. Add to bowls to color icing, then add to piping bags as needed.
6. To store, place clear plastic film directly on icing in bowls and cover with a fitted lid. The tips of piping can be covered with plastic film and bags stored in zippered bags. Frosting will keep up to two weeks.
The options for lighting your garden at night are practically endless and so much more affordable than hiring an electrician to install lighting. Plus, what is more environmentally friendly than decorating with solar lights? Keep reading for 18 ways to add enchantment to your garden with solar lighting.
Over a patio. Stringing solar lights over your patio provides a cozier feel, almost as though you are being protected by a roof. To simplify this project, attach lights to the house, but also to 10′ copper pipes stuck in the ground. Copper pipe is decorative and can be stabilized by fitting it over some rebar pounded into the ground. Or, another possibility is putting the pipe in a tall planter that has a 5-gallon pot with gravel in it. Soil and plants can then be placed above the bucket. An S-hook is inserted at the top of the pipe to hang the solar light. Here I used these solar ball lights which have even held up over two winters. If they do every need to be replaced, I want to try these celestial lights over the patio next time.
Add a lantern. A solar lantern can be added to a tabletop or hung from a higher point, such as an arbor or plant hanger. This firefly lantern might remind you of summer evenings spent catching fireflies.
Fairy Garden. Nothing makes a garden magical like adding solar lights to your fairy garden.
“Water” your plants with solar lights. One of my favorite changes to my garden last year was the addition of this solar watering can which is “watering” my heliotrope plant.
Highlight an urn or fountain. To highlight a focal point in your garden, consider a spotlight, either a warm white or these colorful solar lights which change colors, adding interest.
Container stake. Add some whimsy to your favorite containers by adding a decorative solar stake. This moon and stars pack could be used in a trio of containers.
Lining a bed. To highlight your garden plantings at night, consider solar lights edging your garden beds. These tulip lights can be directed downwards highlighting your favorite plants. Here is a similar style in my garden.
Lining a pathway. These stake lights will illuminate your path when you walk through the garden at night or perhaps coming home after a late night. These celestial lights will even reflect moons and stars.
Focal point. If you are looking to add a major wow factor in your garden, consider making solar lights the focal point. Some examples include this willow tree, this moon, a peacock, or allow this whimsical fish to swim through your flowers.
Tabletop lighting. Add a centerpiece or group a solar light with other decorations at night. This lotus lamp is especially lovely.
Interspersed with your flowers. Since regular plants cannot be seen at night, “plant” some solar flowers like sunflowers or tulips. Similarly, add decorations such as these firework stakes.
Floating. If you have a pool or small pond, there is a wide array of light choices. Perhaps these floating lanterns or balls would be the perfect touch to enjoy your water feature at night.
As post caps. If you are looking to light up your entire garden, consider adding post caps to your fence posts. They come in tremendous range of prices and styles.
Inside a shed or greenhouse. Do you have an outdoor structure that doesn’t have electricity? A solar panel outside the structure can easily be connected indoors to light your tasks at night. Just use this solar shed light.
Doorway. If you have an exterior door without lighting, a simple hanging solar light will help you find your keys or the doorknob after dark.
Some posts on this site include affiliate links. If you click on a link and make a purchase, we may earn a small commission at no extra cost to you. Please know that the opinions expressed are entirely our own.
If you are like me, a visit to a garden nursery can easily be an expensive outing. To create the garden of my dreams, it took both patience and thoughtful choices to get the most from my gardening dollar.
ACQUIRING PLANTS
Of course, you are most likely to spend most of your money at the garden nursery and there are many opportunities to save money while getting the plants you love.
Buy containers with multiple plants. By examining plants carefully, you will find some containers have 2-3 plants when other containers of the same plant only have one. This is especially common with vegetables like tomatoes, peppers, cucumbers, squash, and melons. When you buy a container with more than one of these types of plants, you can VERY carefully separate the roots and then plant the vegetables separately. See this marconi pepper? Maybe 25% of the containers that I looked at had two plants, but I looked them over carefully and walked away with two plants instead of only one.
Buy plants that are easily divided after purchase. Similarly, there are some plants which root along the surface of the container. If a thick enough mat forms, you can divide these plants into two or sometimes even more pieces with a pair of scissors. Some examples of plants for which this works include Creeping Jenny and dichondra. Select your plants carefully since some plants will have a thicker mat. Since you are destroying some of the roots, it helps to then cut the plant back by about a third. Similarly, if you inspect the base of a Dracaena spikes plant, you will see that some have divided into two parts that can be separated into more than one plant
The silver dichondra, Dracaena spikes, and yellow-green creeping Jenny in these photos were divided upon purchase to create more plants.
.
Select annuals that will bloom all summer. Where I live, the summers get so hot, that certain plants peter out. Therefore, one way to save money is to mostly select annuals that do well in heat. See 10 Container Flowers that Bloom All Summer
Make the most of sales. The nurseries in my area have flat sales every year where I can get 36 plants for about $13-15 per flat. The selection is not great, but it is a good opportunity to stock up on 4 flats of impatiens which I use to provide the foundation for the more interesting plants that I grow. Having so many of the same plant also provides nice repetition throughout the garden, a core tenet of design. Even if your area doesn’t have flat sales, you can often buy similar types of plants at hardware stores. In addition, premium annuals often go on sale at a deep discount after 4th of July. You could buy a plant, enjoy it for about six weeks or so and then take cuttings to overwinter, assuming it is the type of plant for which this might work. To make this most of the sale strategy, keep records of purchases (what, where, when, and how much). If you see a good price on something you might want next year, try to take a quick note of the same information.
Don’t impulsively remove plants. When I moved into our house, there were hostas at the base of a large tree in our yard. I hate hostas and tearing those out was one of the first things I did. This ended up being a huge mistake because one plant after another failed in that spot. Eventually what did I successfully plant there? Hostas. I spent money on hostas when I could have just learned to love the free hostas that were free and growing there in the first place.
Propagating
Know which plants are best started from seed. It bothers me when I am at a nursery and see plants for sale that are very easily grown from seed and typically need to be planted in multiples. These plants include lettuce, spinach, basil, dill, parsley, beans, and peas. If you want to grow these plants, I would encourage you to consider buying seed and direct seeding them where they will grow for the season. The yield will be significantly higher than growing just one plant.
Root cuttings. Some expensive annuals can be rooted if you purchase them early enough in the season. I don’t recommend this if you need a large plant for a planter, but it can work well if a small plant will suffice. I have successfully started euphorbia cuttings in water and many others such as torenia, angelonia, coleus, and double impatiens by sticking cuttings in rooting hormone and then potting mix. Even better, take cuttings in fall and overwinter them indoors or in a greenhouse for the next season. For best success research the best propagation strategy for the plants you wish to root.
Divide your perennials. To thrive, some perennials benefit from dividing every few years. Once you have grown a plant for couple of years, you might be able to divide it to create more plants. In fact, one strategy is to buy one of several types of plants that appeal to you and then divide the plants you like and that have survived a couple of years later. Some perennials that you might like to divide are phlox, echinacea, yarrow and salvias. Many gardeners do not especially enjoy this task, so you might be able to score some free plants by dividing your friend’s or neighbor’s perennials such as salvia, echinacea, daylilies, and hostas. You might also keep an eye on social media, Craig’s list and Freecycle for offerings of free divisions.
Phlox, echinacea, salvia, and yarrow are plants that can be divided after growing for a few years.
Create new plants through layering. Dividing plants can be more work. First, they need to be dug up which isn’t too bad, but then those perennials need to be consistently watered the rest of that season. One way to get around this is to look for places where certain plants might have created new roots at an edge allowing you to cut a piece off with a sharp shovel and plant it elsewhere. You can even encourage this by cutting the leaves and piling some soil around the base of a plant. Some examples of plants that naturally layered for me include clematis, hydrangea, and vinca. I also was able to encourage this by taking the leaves off some clematis vines at the base and then using a garden staple to attach the base of the vine to the ground and covering up the base with some soil. Next year, I had a nice root that could be transplanted elsewhere. (photo of hydrangeas). To learn more, research layering.
Annabelle hydrangea and clematis are two plants which I have been able to multiply through layering. This has always been unplanned.
Save kitchen scraps. I used to try to grow scallions from seeds, but had mixed success. Eventually, I realized that I could just plant scallions from the store if I didn’t think I was going to use them. I plant them in a windowsill over the winter. In spring, I harden that container off for a few days and then grow the scallions outside all summer. When I want some scallions, I can lift some out if I want the whites, but usually I just cut off some of the green. The green regenerates fairly quickly. Although I have read in several places that it is not recommended, I have also successfully grown potatoes that sprouted.
Scallions transplanted to an indoor container for winter.
Preparing for Next Season
Save seeds. Certain plants are easy to save seeds from, but be sure to save seeds from open-pollinated plants, not hybrids. Just a few examples are certain varieties of tomatoes, peppers, peas, and beans. You might even be able to trade seeds with other gardeners.
Among many other possibilities, peas eggplant, tomatoes and cosmos are all good candidates for saving seeds.
Save small potatoes to grow next year. Every fall, when harvesting potatoes, I save the very smallest in a paper bag in a cool spot of my basement. Those potatoes sprout and grow stalks during the winter. As early as recommended the next spring, I very carefully plant those potatoes trying not to break the stalks.
Overwinter your favorite plants. If a plant is expensive, it might be worth trying to overwinter at least once just to see what happens. Certainly some plants are easier to overwinter than others. Without a doubt, I have had the greatest success with geraniums. One winter, I planted them in a window in my basement and forgot about them for months. To my great surprise, they were green when I found them and grew well after hardening off. I have also had success with euphorbia, double impatiens and heliotrope. You might do best if you take cuttings and grow them for a while outside in the fall before bringing the cuttings in.
This heliotrope plants cost a fair bit, but overwintering it means I only needed to make the purchase once.
Wintersowing. Without a doubt, one of the least known, least expensive, and greatest ways to create new plants is through wintersowing. Sometime after December 21, but before it gets too warm in the spring, you can sow seeds in moist soil in clear covered plastic containers such as the containers in which you might buy spinach or gallon milk jugs. The containers are then placed outdoors and, when conditions are right, the seeds will sprout. I usually only need to water these containers every few weeks at most when I see there is no more condensation on the lid. This method works well with many seeds, but I have the most consistent success with these seeds: kale, cosmos, sunflowers, zinnias, gomphrena, bachelor’s buttons, calendula, parsley, dill, and chamomile.
EVERYTHING ELSE
Reuse. Don’t throw things away without considering how they can be reused in your garden. A watering can that leaks can be reused a planter. The plastic labels that come in containers can be reused in next year’s containers by writing the name of a plant in permanent marker. Containers can be used to sow seeds next year. Newspapers and fleece can be used as capillary matting to keep plants moist. Cardboard and newspapers can be laid on the ground as a weed barrier.
Use yard waste. In addition to using yard waste to create compost, yard waste such as untreated lawn clippings and chopped dry leaves can be used as mulch.
Research inexpensive fertilizers and herbicides. Before spending a lot of money on fertilizers and herbicides, research lower-cost alternatives such as using diluted vinegar to kill weeds and crushed egg shells to fertilize. The list of possibilities is practically endless. Coffee grounds can be worked into the soil of plants that need acidity such as blueberries and might even benefit lettuce. Kitchen scraps can also be used to make compost. Compost can be used to make compost tea to fertilize plants.
Think outside of the box when solving problems. Coir liners are quite expensive, but often burlap bags will work in the same situations. Small mesh trash cans from the dollar store can be turned upside down as an inexpensive way to protect plants from rabbits.
Utilize an automatic watering timer. Without a doubt, the thing that has saved me the most money is finding a way to keep my garden watered, especially once the summer heats up and missing even one watering can mean the end of your plants. Therefore, some kind of automatic watering system is essential. This is one area where a splurge makes sense because it will save you money in the long run. You can buy timers that water only one zone, but a timer that waters multiple zones is ideal for individualizing your watering. For instance, you can have a zone for vegetables, one for bedding plants, and one for containers. Best of all, you can go away on vacation without needing to find somebody to keep your garden watered.
Utilize drip irrigation. Like buying an automatic timer, drip irrigation is also an investment. However, it also saves money because you can better direct irrigation towards the roots of your plants which means they require significantly less irrigation overall. You can also better individualize the amount of water each plant gets. Best of all, it is not nearly as difficult as it might seem. To learn more about drip irrigation, please see The Beginners Guide to Drip Irrigation.
If you are starting your first garden, you may be tempted to just buy the plants that most speak to you, either due to their beauty or the food they produce. You may think it is just a matter of buying what you like, planting, then keeping things watered. In actuality, for most of us, our gardens are never done. Every year is a chance to learn and improve our gardens. Therefore, the final tip is directed at you perfectionists out there. Try to enjoy the gradual process of curating your favorite plants over time and watching your garden evolve.
My journey to easy meal preparation was not an easy one. I started by trying some “dump” recipes where you put all of the ingredients for an entire meal into a bag and then when you are ready to cook, you can just dump the whole thing in your slow cooker. The problem was some of the foods were overcooked, while others were undercooked. I eventually decided that any recipe with the word, “dump” was not a recipe for me.
I also tried freezing different casseroles and soups, but while there were some successes, many turned to mush. The other problem was that we like a lot of variety and, after having a meal, I usually didn’t want to repeat it for months. This is why I eventually learned to just freeze versatile ingredients that I can use in many of our favorite meals.
Why should I consider freezing these ingredients?
improves meal quality
increases meal variety
saves food prep time
reduces dirty dishes
saves money since you can buy in larger quantities or stock up when items are on sale
reduces food waste
often helps with portion control
How should I freeze the following items? It varies depending on the amount you expect to use at any one time. One idea is to freeze in portions and then move the frozen portions into zippered plastic bags.
Another space saver is to freeze in a zippered bag and then flatten the bag out before freezing so items can be stacked. Best of all, after the items are frozen, they could be stood upright in plastic bins similar to folders in a filing cabinet if your freezer allows this configuration.
Finally, when you expect to need larger amount, it works well to freeze in plastic or glass freezer containers. If you would like to do this, look for square containers since they use space more efficiently.
Some people prefer taking a day once a month to do all of their meal prep, but that isn’t for everybody. Most of the items listed below can be prepared in large quantities during the regular preparation of a meal and the unused portion frozen for future use.
Sausage Crumbles How to prepare: Cook bulk breakfast or chorizo sausage (i.e., no casing) in a skillet until fully cooked and crumbled. Cool and then freeze in plastic bags in the amounts you are likely to consume. How to use: pizza, soup, egg dishes, hash skillets, stuffed vegetables, casseroles, pasta, sandwiches or go here for more ideas 25 Best Ground Sausage Recipes
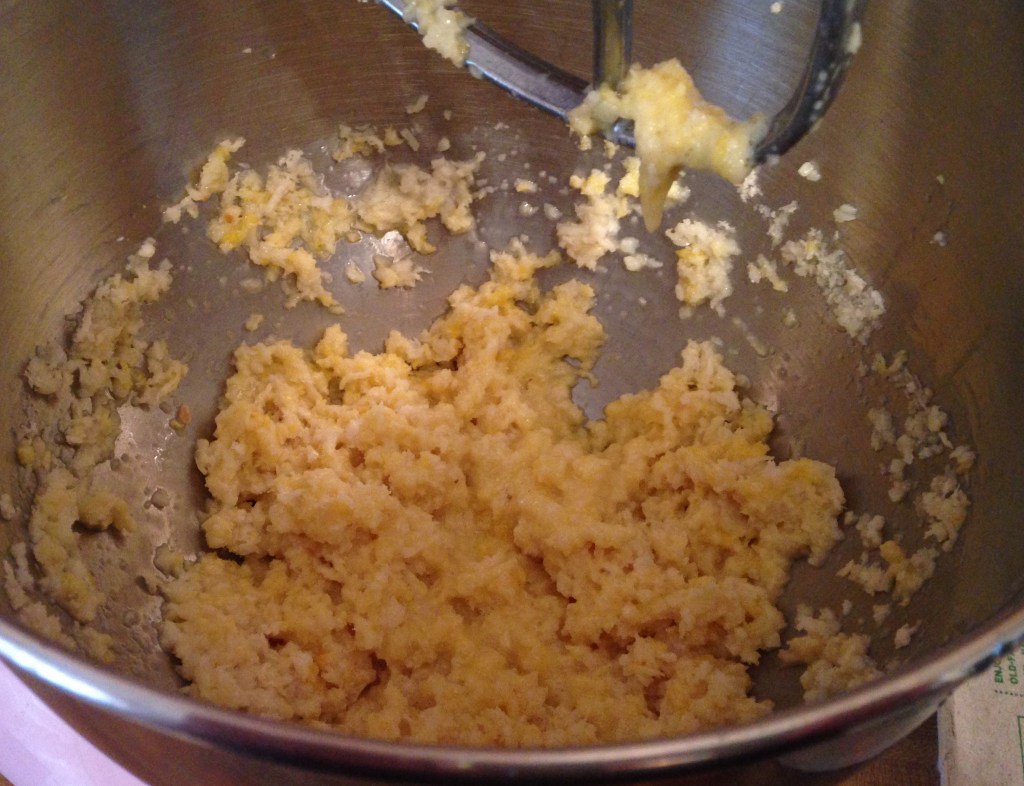
Shredded Chicken How to prepare: After cooking, shred chicken using the paddle attachment of your mixeror two forks. Freeze in flattened zippered plastic bags. How to Make Shredded Chicken How to use: soups and chilis, quesadillas, BBQ chicken sandwiches, wraps, burritos, nachos, chicken salad, chicken pot pie, BBQ chicken pizza, salads, bowls or go here for more ideas 50 Shredded Chicken Recipes
Italian Meatballs How to prepare: There are lots of great recipes to choose from. Here is mine: Kenda’s Spaghetti and Meatballs Please note that the marinara and meatballs should be frozen separately. How to use: spaghetti and meatballs, pizza topping, meatball sub sandwiches, sliders, soups, casseroles, or even shape the meatballs into meatloaf instead. Please go here for more ideas 42 Crazy-Good Dishes That Start with Frozen Meatballs
Taco Meat How to prepare: Follow directions on your taco spice package. Spanish Gardens makes my family’s favorite. Allow meat to cool completely and then freeze in flattened zippered plastic bags. How to use: tacos, burritos, quesadillas, nachos, enchiladas, pizza, pastas, casseroles, stuffed vegetables (e.g., zucchini, bell peppers), salad, soups, or go here for more ideas 25 Recipes You Can Make with a Pound of Taco Meat
Sloppy Joe Meat How to prepare: The BEST Sloppy Joe Recipe sauce described here. Freeze in flattened zippered bags. How to use: sandwiches, casseroles (e.g., Tater Tot), pasta topping, stuffed vegetables (e.g., peppers or zucchini, top french fries or corn chips, top rice or mashed potatoes, stuffed baked potatoes, or go here for more ideas 36 Ways To Repurpose Sloppy Joes Into Something New
Italian Meat Sauce How to prepare: Brown ground beef and mix with your favorite homemade marinara. One option is the sauce described here. Simply make without the meatballs and mix with the ground beef crumbles. Freeze in flattened zippered bags. How to use: pasta sauce, pasta casseroles (e.g., lasagna), pizza sauce, stuff vegetables (e.g., pepper, spaghetti squash, zucchini), mozzarella grilled cheese or go here for more ideas Ways to Use Leftover Pasta Sauce
Chili How to prepare: If you don’t have a favorite chili recipe already, here is an Easy Chili Recipe to try. My family loves Williams Chili Spice Mix and it makes chili night easy. Freeze in flattened zippered bags or plastic or glass containers. How to use: Baked potatoes, spaghetti topper with cheddar, chili dogs, crescent roll casserole, wraps, chili mac soup, over fries or corn chips, cornbread casserole, stuffed peppers, or go here for more ideas 20 Ways to Use Leftover Chili
Marinara Sauce How to prepare: There are so many tasty recipes, but the sauce described here is my favorite. I freeze some in flattened zippered plastic bags and some in muffin tins to use for pizza sauce. How to use: Cooking your own marinara allows you to create a thicker sauce that can be used for pizza or thinned a little for pasta sauces, casseroles. Marinara can also be used to top chicken parmesan, meatloaf, meatball sandwiches, and stuffed vegetables. Add even more water for soup. Please go here for more ideas 70 Meals that Start with a Jar of Pasta Sauce
Pesto Sauce How to prepare: Fresh Basil Pesto Freeze in ice cube trays or silicone muffin tins and then store in a zippered plastic bags. How to use: pizza, pasta topping, pasta casserole, top chicken or salmon, flavor vegetables, sandwich spread, soups, or go here for more ideas: 25 Things to Make with Pesto
Condensed Chicken Stock How to prepare: I keep a bag in my freezer where I can quickly stuff leftovers such as chicken bones/carcass, dill and parsley stems/leaves, celery, carrots, and onions. This allows me to make a rich chicken stock. Condensed Chicken Stock can be frozen in ice cube trays or muffin tins. Just be sure that you know how much water to add to each cube. How to use: Soups, gravies, and sauces are obvious, but stock can also be used in casseroles, skillets, chicken pot pies and other ideas listed here 40 Recipes with Chicken Stock to Use up the Box
Cooked Rice How to prepare: Cook brown or white rice according to package directions, then thoroughly cool. Freeze in zippered plastic bags, removing as much air as possible. Use immediately after removing from the freezer. How to use: fried rice, topped with stir fry, with beans, soups, casseroles, skillets, stuffed vegetables, topped with etouffee or gumbo or go here for more ideas 35 Ways to Use Leftover Rice
Mashed Potatoes How to prepare: The most important thing is to use the right kind of recipe. This recipe uses sour cream and cream cheese instead of milk/cream which prevents grainy mashed potatoes upon thawing. Potatoes could be frozen in a flattened zippered bag or in a silicone muffin tin and then transferred to a large zippered bag. How to use: as a side, topped with meatballs or chicken and gravy, topping Shepard’s pie, casseroles, potato cakes/croquettes, breads, dumplings, waffles, pancakes, soups, gnocchi, pierogi, or go here for more ideas: 35 Easy Ways to Use Leftover Mashed Potatoes
Aromatics How to prepare: The aromatics to use depends on how you most frequently flavor your meals. For guidance, please see Freezing Aromatic Flavor Cubes for Asian Stir-Fry Suppers and All About Mirepoix, Sofrito, Battuto, and Other Humble Beginnings. Caramelized onions can be frozen in a silicone muffin tin and then transferred to a zippered plastic bag. Roasted garlic can be frozen in an ice cube tray, as can citrus juice, with or without its zest. Herbs can be minced and frozen in an ice cube tray and some butter or oil added, depending on what is most appropriate for each herb (e.g., butter in dill, canola in parsley, olive oil in basil). Garlic and herb cubes can then be transferred to a zippered plastic bag. How to use: Most work well in a variety of soups and sauces. Here are some additional uses for the different types of aromatics: Asian (stir fry, noodles, fried rice), Mirepoix (chicken pot pie, roasted poultry and dressing), Spanish Sofrito (arroz con pollo, eggs, paella), Holy Trinity (jumbalaya, gumbo, etoufee, red beans and rice), caramelized onions (any recipe that requires you to cook an onion until softened), roasted garlic (any recipe that requires you to cook minced garlic until aromatic), fresh minced herbs (any dish that is finished with fresh herbs like parsley, dill or basil), citrus juice (any dish finished with a bit of fresh citrus).
Some posts on this site include affiliate links. If you click on a link and make a purchase, we may earn a small commission at no extra cost to you. Please know that the opinions expressed are entirely our own.
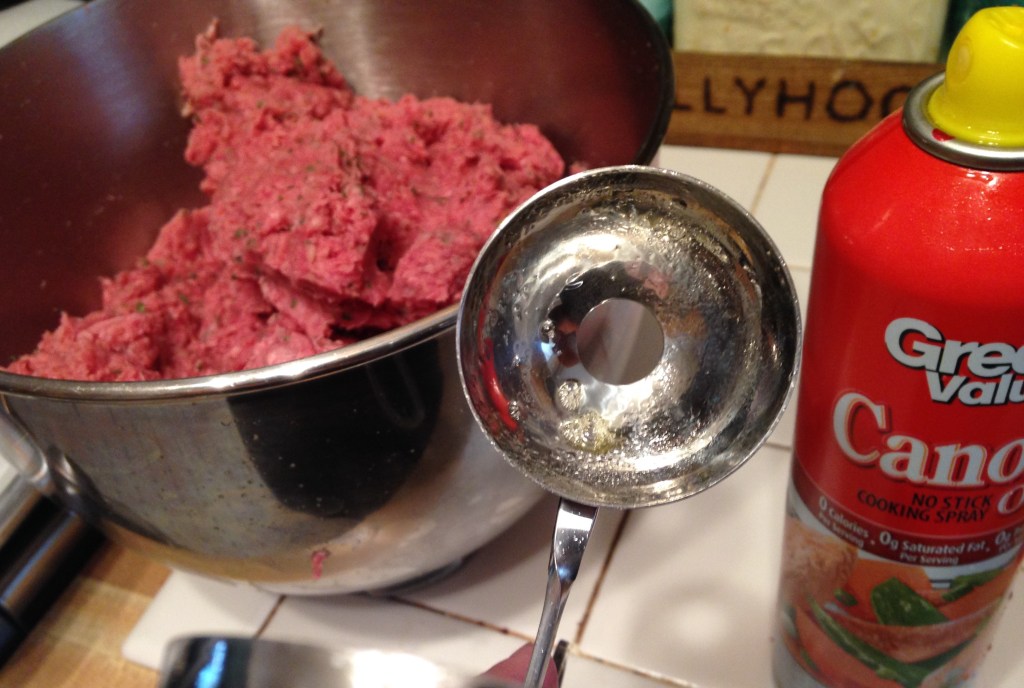
This is hands down the recipe most preferred by my friends and family. I am pretty sure my husband married me so that I would make him this the rest of his life.
Making a triple recipe of meatballs means there are many leftover to freeze.
Sauce
olive oil
1 onion, finely chopped
1 clove minced garlic
28-32 oz tomato sauce
12 oz tomato paste
1 cup water
1 TB sugar
1 tsp (or a little less) salt
1/2 tsp pepper
1 1/2 tsp oregano
Meatballs
milk
4 slices white or potato bread, dry in a warm oven for an hour or so
2 eggs
1/2 cup grated Romano cheese or a parmesan/Romano mix
2 TB dried parsley
1 tsp dried oregano
1 tsp garlic powder
salt and pepper to taste
1 lb ground round
For sauce:
1. On medium heat, sauté onion in a little olive oil until just turning golden. Add garlic and sauté another minute.
2. Add other ingredients and simmer uncovered on medium low for 30 minutes, stirring frequently.
3. Add meatballs, cover and simmer on low another 30 minutes.
For meatballs
1. Dip bread in milk and squeeze excess milk out. Discard leftover milk.
2. Mix all other ingredients, except beef, well.
3. Finally, gently mix in beef until just combined.
4. Shape into meatballs about the size of ping-pong balls.
5. Brown meatball in a frying pan with a little olive oil OR bake in oven on a rimmed cookie sheet greased with olive oil for 10 minutes at 450 degrees. Flip and bake another 10 minutes.
6. Add meatballs to sauce and cook another 30 minutes.
7. Serve over spaghetti.
8. This sauce tastes best the next day
Battery-Operated Metallic String Lights. These are ideal for installations where plug-in lights would be impossible or unsightly. They automatically come on at the same time every day and stay lit for six hours. This means that you can use them almost anywhere AND the battery will last a few weeks. If you buy rechargeable batteries and a charger, you can save money over time.
“Outdoor” Solar Lights. These lights work well near a window so the solar panel can be placed against the window pane. They even come in colors such as pink!
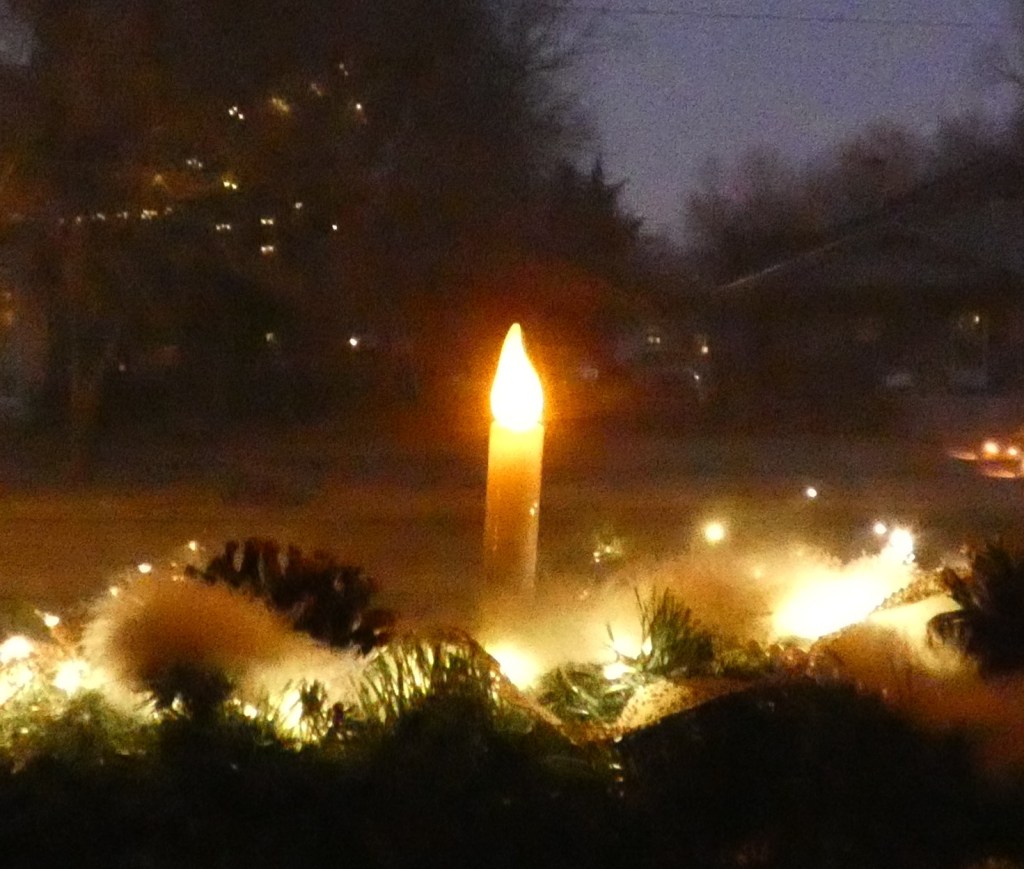
Battery-Operated Candle Lights. These lights have a sensor which detects outdoor light. This allows them to automatically come on at dusk and stay on for many hours afterwards. This means the batteries last between Thanksgiving and New Years without replacing.
Wired Lights. These work well when an outlet is nearby and the lights can be installed without the cord showing.
Shadow box. To create this shadow box, a Christmas saying was designed, printed and matted to serve as the backing. A crescent moon was hung and some favorite miniatures: a Corvette, an Airstream trailer , and bottle brush trees similar to these, were placed in the bottom, along with some fake snow.
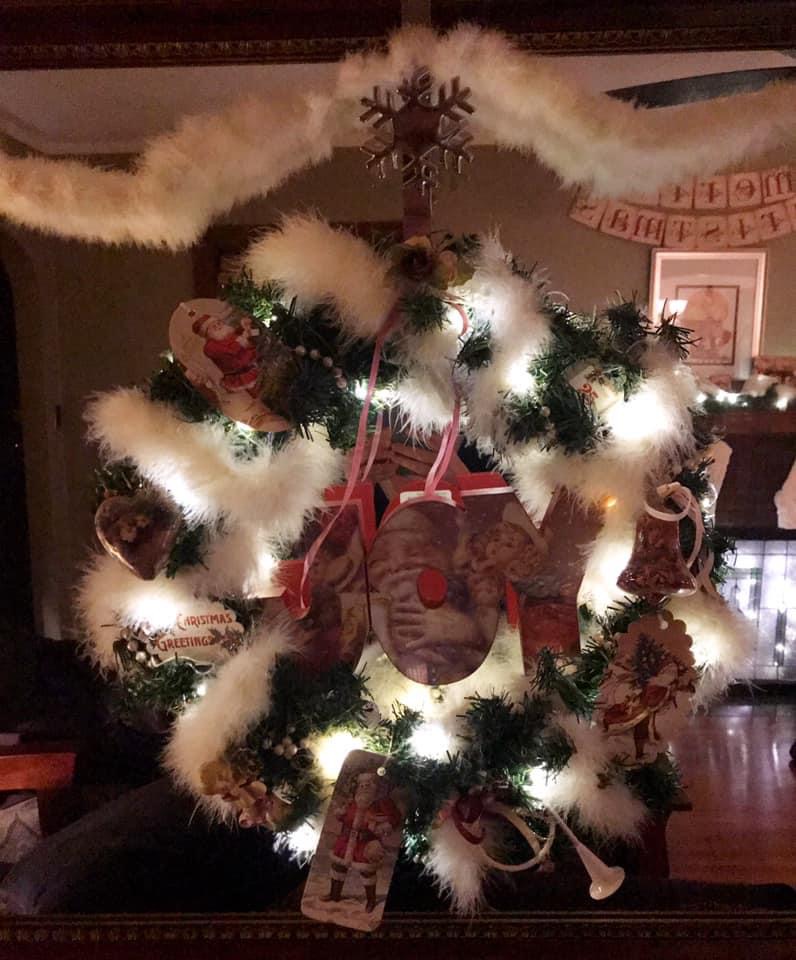
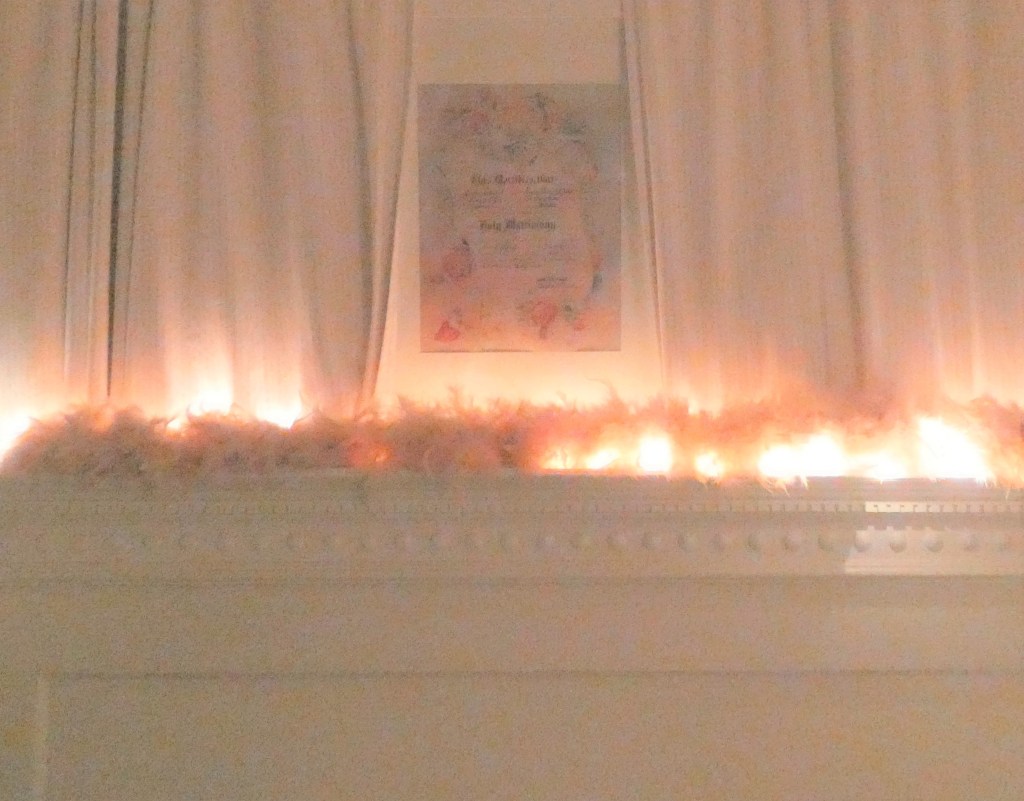
Christmas Card Display. These battery-operated metallic string lights surround an entry closet door. Decorative clothespins are used to attach Christmas cards as they arrive. The center of the door features an antique card sent by the original owner of the home.
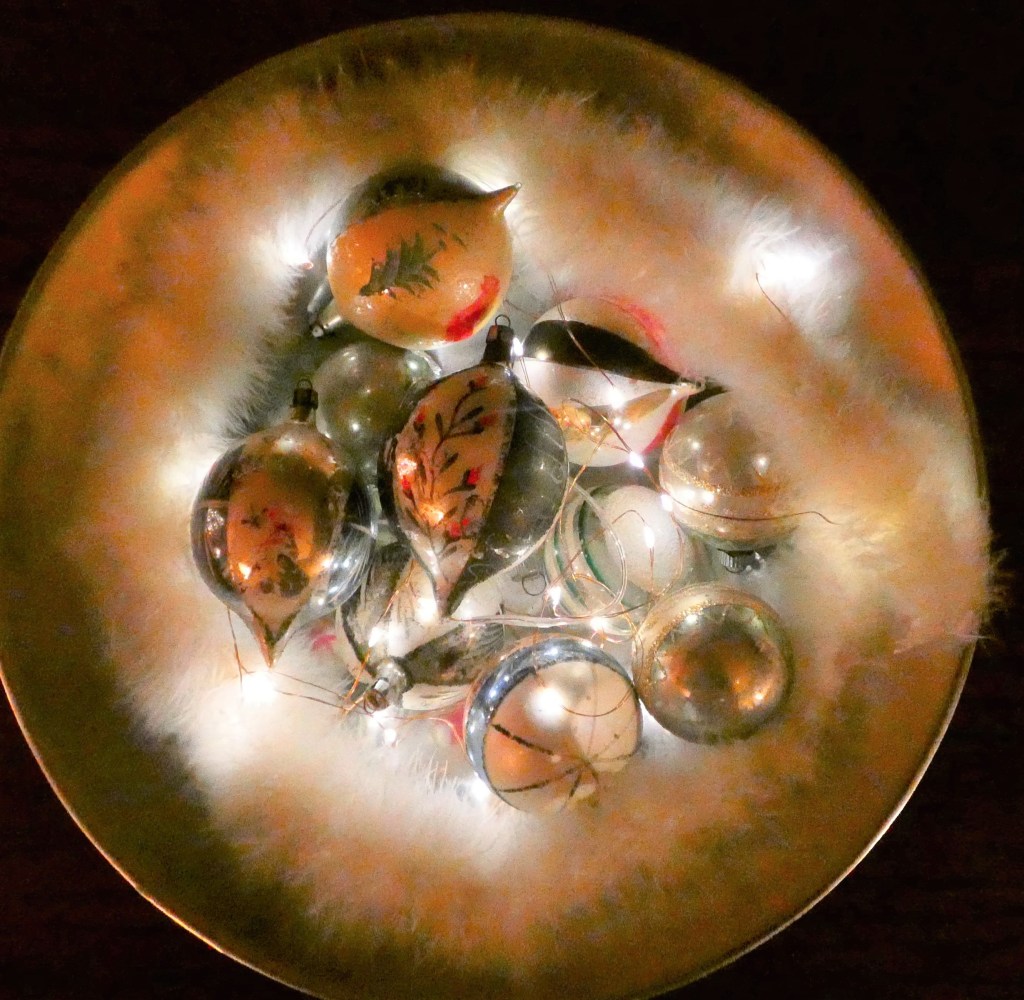
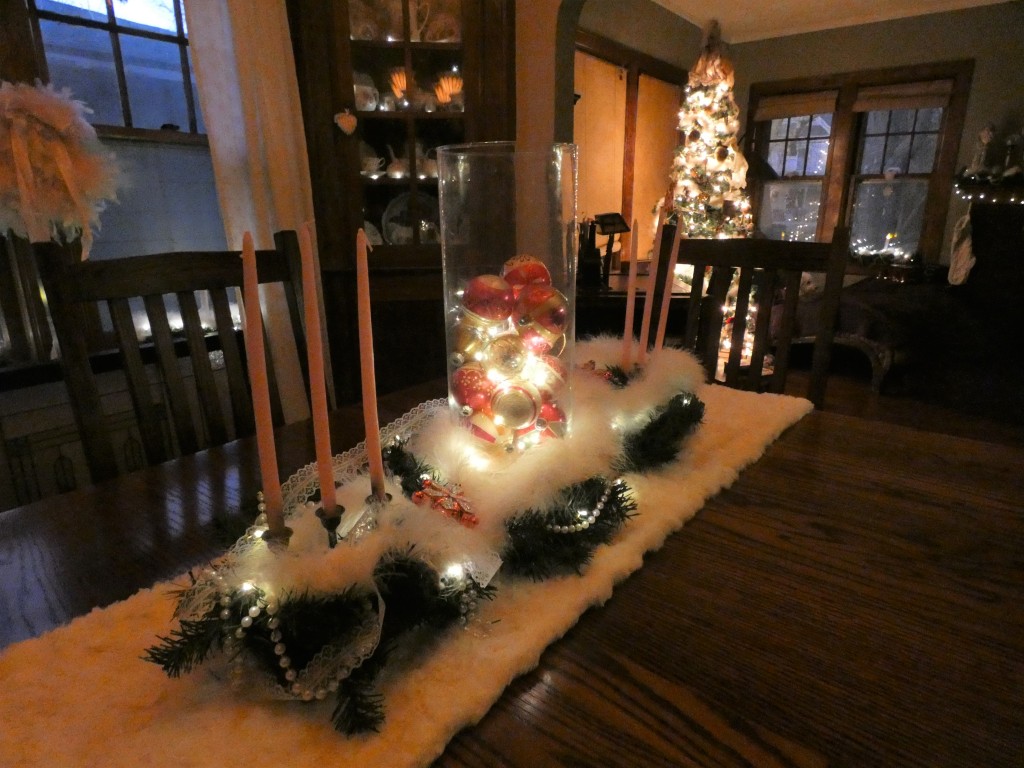
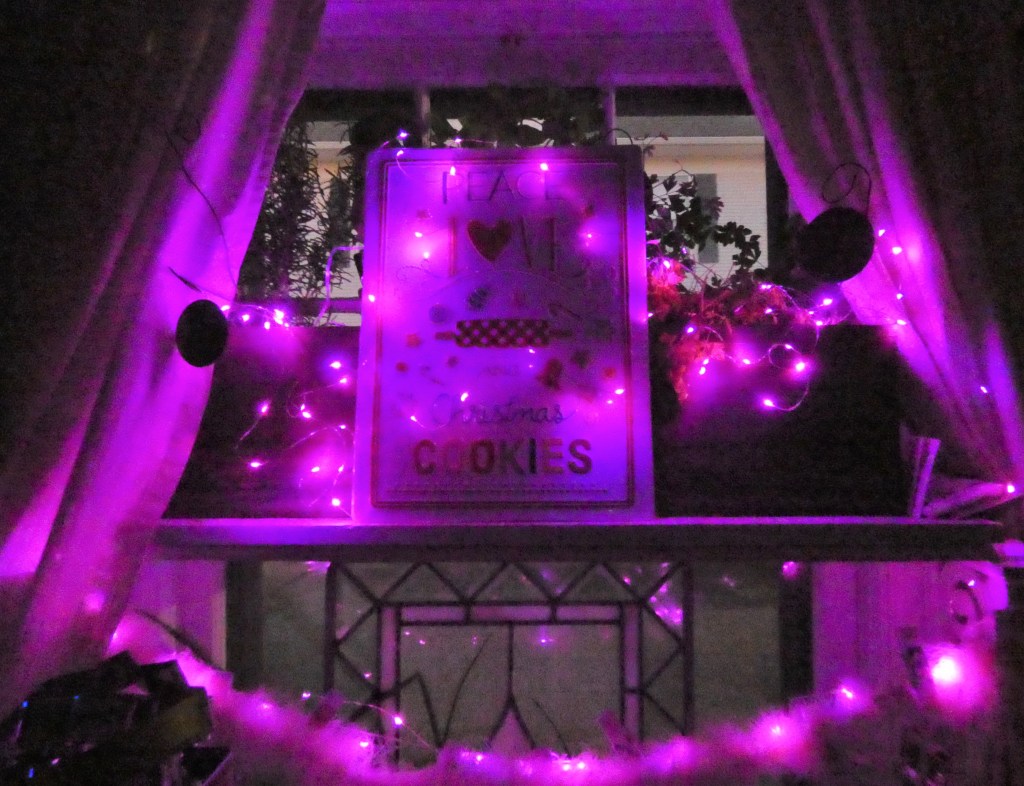
Candle Lights in Windows. These Battery-Operated Candle Lights conserve energy through the light sensor. The candle is surrounded with garland, wire lights, pearls, lace, and a boa. Above the candle lights hangs a crystal snowflake ornament.
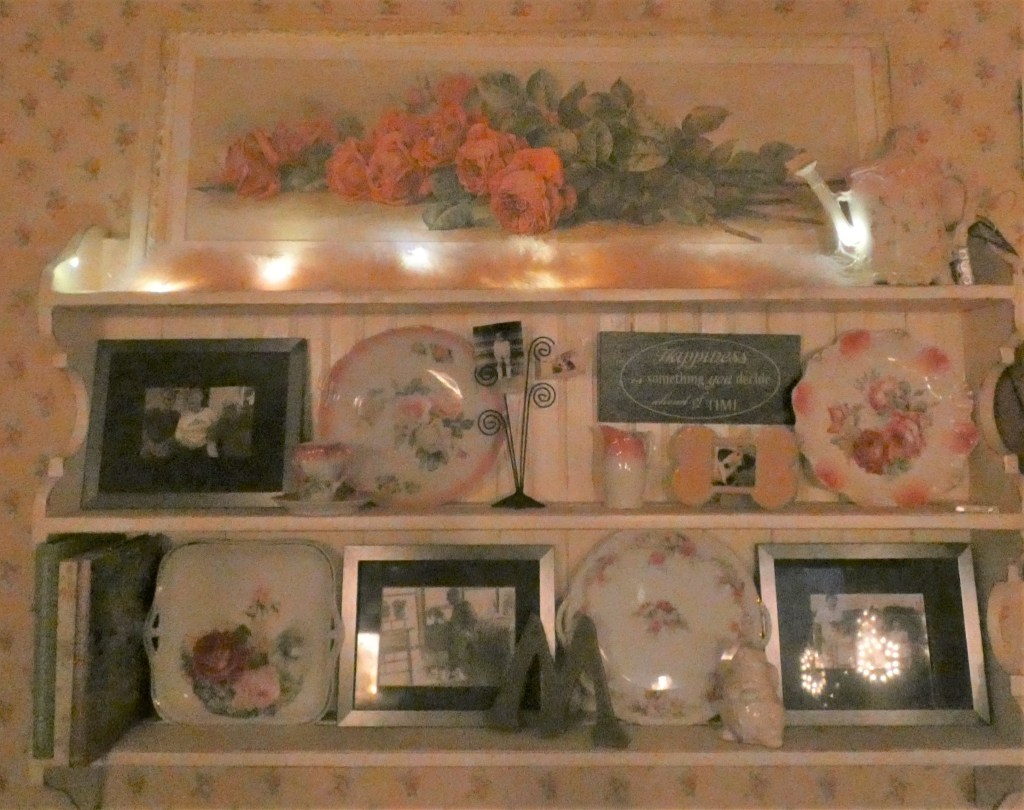
China Cabinet. These battery-operated metallic string lights help to illuminate Bavarian china, though the glass front of a china cabinet. An ornament hangs on the door.
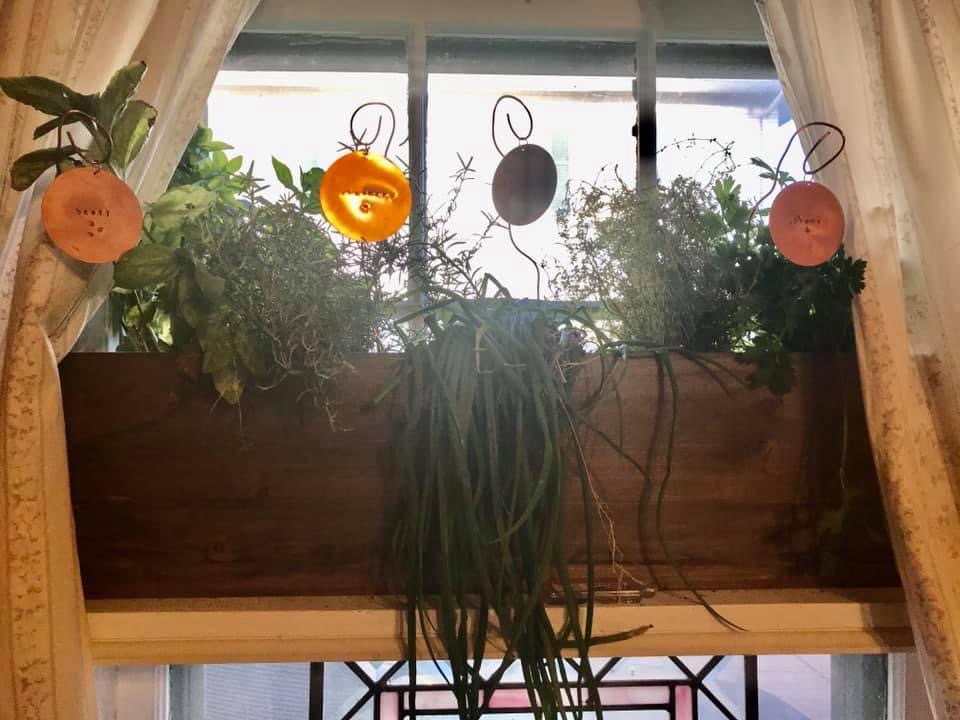
Bathroom window. “Outdoor” Solar Lights are ideal to surround a bathroom window even indoors since wired lights would be unsafe above a bathtub. These lights are relaxing for warm winter bubble baths. A glittery miniature tree sits in the copper tray on the windowsill. In the spring, seeds will be planted here.
Headboard. These wired lights pair with a pink boa above a headboard. To learn how to create this headboard, please see this tutorial.
Some posts on this site include affiliate links. If you click on a link and make a purchase, we may earn a small commission at no extra cost to you. This commission allows us to avoid banner ads and popups. Please know that the opinions expressed are entirely our own.
Some posts on this site include affiliate links. If you click on a link and make a purchase, we may earn a small commission at no extra cost to you. Please know that the opinions expressed are entirely our own.
I have been wanting to build a gingerbread house for literally decades. I decided this was the year. I absolutely underestimated the amount of work, but I ended up being pleased with the final product. I think the key to creating a house that I love was layering inexpensive decorations, mostly purchased from dollar stores and Wal-mart. Let me share with you some specific details and also let you know where I purchased many of the decorations
The front door is a breakfast biscuit from Dollar Tree which is a generic for Belvita biscuits. It has a dragees doorknob and royal icing wreath. Above the door is a tree sprinkle on a peppermint and a bell made from a yellow gumdrop and a dragees. The garland is green royal icing, sugar pearls, and some large sixlet-like candies from the cake decorating section at Wal-mart.The “Joy” banner is attached to a large pretzel rod. Above the banner are gingerbread man sprinkles on peppermints. A snowflake is on either side of the banner with a dragees in the center.The clock is made from a chocolate-covered graham cracker, topped with a vanilla cookie, topped with a mint candy. Hands were piped from royal icing and are centered with a heart sprinkle.The stained glass windows were made from pouring edible glass windows and then quickly sprinkling chopped lifesavers and jolly ranchers into the hot syrup. Cutting a hole in the back of the house allowed a string of lights to be inserted for a magical glow at night. The best thing about these lights is that they are battery operated, so you don’t have to worry about being near an outlet AND they operate on a timer so only light up for about six hours per day which allows the batteries to last for about 3-4 weeks. Using rechargeable batteries will keep the cost down over time.The window box is a vanilla sugar wafer with smartees and sprinkles glued to the front with royal icing. A strawberry pocky stick forms the candle. The green royal icing is decorated with sprinkles and a large royal icing flower.Windows are topped with half a vanilla cookie, a Haribo cherry heart candy, and dragees. Pirouline wafers are between the windows. The chimney is an ice cream cone filled with royal icing and a Haribo cherry heart candy on top.The chimney is an ice cream cone filled with royal icing and a Haribo cherry heart candy on top.The house features pink swirl lollipops on either corner of the house. The pastel marshmallows line the roof’s edge. Royal icing is highlighted with dragees in many places. Chocolate sugar wafers form the front stairs.
Where did you find the _____?
These candies, cookies, and sprinkles were mostly purchased from Dollar Tree, Dollar General and Walmart. Exceptions were the Haribo Herzbeben heart candies from World Market and the silver dragees Not pictured were the Great Value alphabet cookies from Walmart which spell out “JOY”, the pink swirl lollipops, and the large royal icing snowflakes and pink flowers purchased on Etsy.
Some posts on this site include affiliate links. If you click on a link and make a purchase, we may earn a small commission at no extra cost to you. Please know that the opinions expressed are entirely our own.
A while back, I started looking at headboards and fell in love with one that I saw on the Pottery Barn website. Unfortunately, it was more than I could afford, but I realized that it might be possible to make something similar by attaching a fireplace mantel to an old door that used to be in our old house. Making headboards out of doors is fairly common, but I used to be hesitant just because I typically thought they looked very much like doors. By combining a mantel with the door, this problem is diminished.
If you are handy, you could make your own mantel, but I am not that handy, so I purchased one from Santa Clara Studio on Etsy. I requested a custom size and they were happy to accomodate this request. I specified the dimensions of the door because I wanted the mantel to fit over the door, making it easy to attach. If you are interested in buying the exact same mantel, here is a listing of the one I asked to be customized to my specifictions:
I think it was also important that it is a mantel installed using a French cleat. This meant that there was a hollow space behind the shelf where it was easy to install the shelf over the door using a series of L-brackets.
In addition to screwing the mantel onto the door, it was also necessary to add some boards at the bottom to elevate the headboard and provide a place to secure the headboard to the bed frame.
Once the headboard was secured to the bed frame, it was time for the fun part, decorating the bed! I used my old Laura Ashley bedding that I have owned since the 1980s. It has been a long time, but I still love it!
I also added some throw pillows, including a personalized pillow that I also purchased on Etsy.
Happy Decorating!
Some posts on this site include affiliate links. If you click on a link and make a purchase, we may earn a small commission at no extra cost to you. Please know that the opinions expressed are entirely our own.