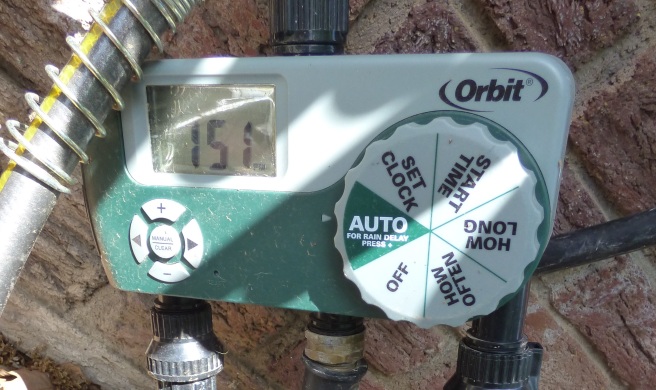
When I first started gardening, I chose flowers ENTIRELY based on looks…I was so superficial back then. I scoffed at those who bought petunias. They were so boring.. I was only going to plant the less common flowers. No impatiens for this girl! So, I planted those unusual flowers. Some of them made it and some of them didn’t. At first I thought it was due to my inconsistent watering. After I improved my watering by using drip irrigation (see here), I realized that it hadn’t been just my poor caretaking, it was also my flower choices. Turns out, the flowers that I so readily scoffed at were probably so common because they were much easier to grow than the flowers I was choosing.

Cool-Season Annuals. I realized that I was wasting a lot of money buying plants that didn’t have much of a chance where I live, so I started making a list of the flowers that I bought in the spring and then taking an inventory in August to see what was still blooming. If a plant didn’t make it to August for two consecutive years, it was downgraded to a “maybe” plant. I didn’t want to completely stop buying all of the flowers that petered out in the heat, because that would mean giving up some of my favorites. Instead, I bought very limited quantities of flowers such as alyssum, pansies, and lobelia and planned for their demise. In other words, during the spring, I would enjoy these short bloomers next to longer-blooming flowers. Once they died or flowering slowed considerably, I would pull them out to make additional room for the flowers that had proven to be longer blooming. Another option is to wait for cooler weather in the fall when these flowers may bloom again.
Heat Tolerant, but Require Deadheading. I also noted that, for some flowers, it wasn’t about the heat. For instance, geraniums and marigolds do well in the heat, but they require deadheading to keep blooming. I began to also limit these to small quantities, no more than I was willing to deadhead. Similarly, Cosmos and Zinnias do well in the heat, but require deadheading to keep blooming. For these, the solution was a cutting garden, the frequent cutting of flower bouquets means an abundance of these flowers for most of the summer.
My Top Ten. The ten cottage annuals chosen for this list do well in containers, even when temperatures top 100 degrees. They do not require deadheading, although a few will benefit from being cut back by half midway through the summer. I usually do this shortly before we go on vacation. We return to find the flowers blooming even better than before they were cut back.
 Torenia. It is a mystery to me why torenia, also known as wishbone flower, is not more widely grown. It is incredibly adaptable, doing well in both sun and shade. Heat doesn’t seem to affect it one little bit, it just keeps on trucking. I now only buy the Summer Wave series from Proven Winners. Any other cultivars have been a disappointment. The above photo was taken of two Violet Torenia plants and one double impatiens, midway through the summer; they were even larger by fall.
 Euphorbia. These tiny white flowers that resemble baby’s breath are a versatile filler in both sun and shade. Don’t over water, it is drought tolerant. Euphorbia is exceptionally easy to take cuttings from and some also overwinter this plant indoors. “Diamond Frost” is a favorite.
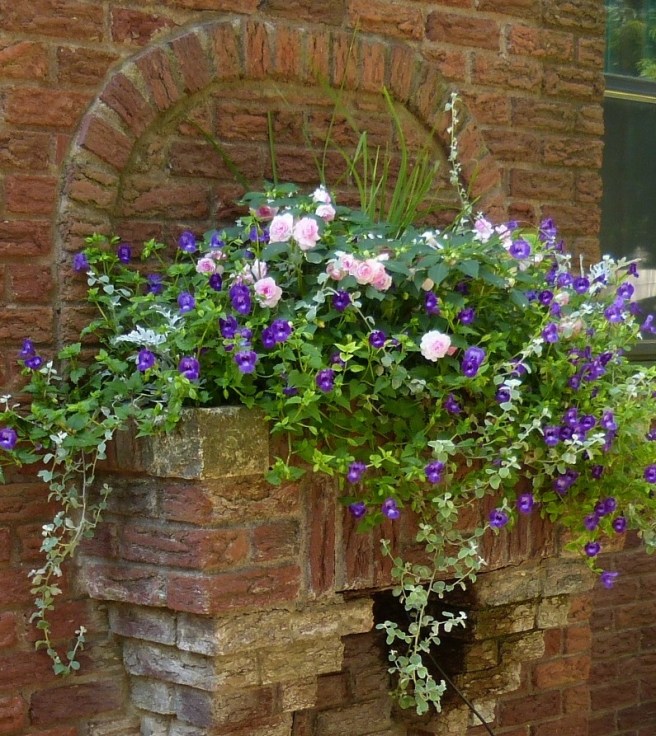
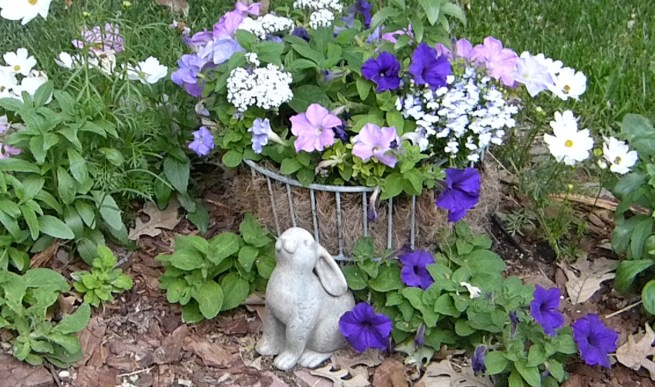 Petunias. Petunias are known as a flower for full sun, but in my area, they seem to do well even in partial shade. Although deadheading may increase the number of blooms, I find it sufficient to cut them back about halfway once in the middle of summer. Petunias seem adaptable to a variety of watering conditions. They come in a rainbow of colors, but I am partial to the pink and purple varieties. If I could afford to do so, I would love to buy dozens of the expensive cultivars, but I am always satisfied with the less expensive plants that I buy in six packs.


Angelonia. Also known as Summer Snapdragon, Angelonia requires full sun and is fairly drought tolerant. Most varieties grow over one foot tall. It is sometimes helpful to cut these back once during the middle of summer. The Serena series is grown from seed and easiest to find, but I prefer Proven Winner’s Wedgewood Blue when I can find it.
 Bacopa. The little white flowers of this delightful plant continue to bloom in part shade to full sun, as long as they are not allowed to dry out. If blooming slows, cut back once about halfway during the summer. Bacopa drapes beautifully over the side of a planter. In addition to this white, it also comes in pink and purple.


Calibrachoa. Once you have grown this prolific bloomer, it is easy to see how it earned it’s nickname, Million Bells. Single Calis looks like mini-petunias, while the double Calis look like mini-roses. It comes in several colors, but I am partial to this Double Pink Calibrachoa. As pictured here, Calibrachoa fills in the planter, as well as spilling over the edge. Calibrachoa needs full sun and be careful not to over water.


Impatiens. Of all the flowers I buy, I depend most on lovely impatiens, also known as, “Busy Lizzies”. There are now some more expensive varieties that do well in sun, but I love the inexpensive varieties that I can afford to buy by the flat to brighten up the shady areas of my garden. In recent years, I was surprised to realize that my impatiens can also do well in sun. The above variety is called Blue Pearl, although they are pink. Impatiens require regular watering.


Salvia. Although these Victoria Blue Salvia were purchased as annuals, many plants often return after a mild winter…or perhaps they just self sow. Salvia are known for their drought tolerance. Be sure to check the projected height of any salvia before purchase. Some grow too tall for smaller containers. Salvia are best in full sun, but also do well in partial shade.


Verbena. While I love the many shades of verbena, most that I have tried required some cutting back for continued blooming. Not so with these little Imagination Verbena. Verbena do well in partial shade to full sun. Although they tolerate some dry conditions, they seem to flower best when kept continuously moist. These verbena are especially useful for adding height to containers.
 Vinca. As a beginning gardener, I could not tell the different between impatiens and Vinca to save my life. Even today, I pay more attention to the foliage, than the flower. Vinca, also known as periwinkle, does well in full sun and is fairly drought tolerant. For me, the plants stay relatively small, but still provide a nice pop of color.
Honorable Mention: The following flowers also do well in heat and do not require deadheading: Pentas, Lantana, Scaevola, Begonia, Moss Rose.
Spend less time deadheading and more time relaxing in your garden.
Happy Gardening!


 Barbed adapter connects to the tubing which carries the water out to your plants.