
I have boxes and boxes of vacation photos and memorabilia that I always plan to put in a scrapbook someday when I have the time. On trips in more recent years, I have promised myself that I would translate my digital photos into a beautiful Shutterfly album as soon as I returned home. It really shouldn’t be that hard to preserve our memories in these ways but somehow life always gets in the way once we return home. That is why, when I saw a Pinterest photo of a school box with enough supplies to create a scrapbook while still on the road, I knew that I had to try it! I immediately created my own portable scrapbook studio in a small pencil box. Unfortunately, my motto in life sometimes seems to be
Anything worth doing is worth overdoing.
That is why, before long, I had instead purchased a larger, deeper box with adjustable compartments (14 x 9.1 x 2.8 inches) and my kit looked like this:

Supplies. Does one really need all of these supplies to make a travel scrapbook on the road? Not even close! All that is really needed is a book or binder with paper and a pencil box with scissors, adhesive, and a pen or marker. Still, I had a lot of fun having all these extras. Here is a list of what I took in my portable scrapbooking studio.
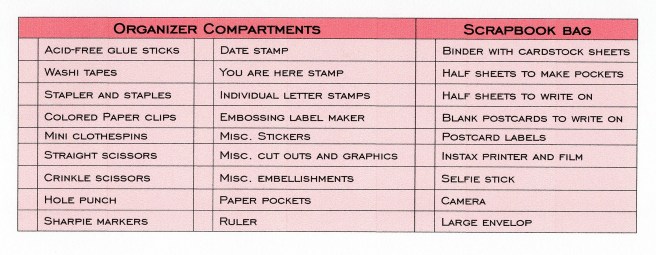 Where to buy. Most of the items on this list can be found at hobby stores such as Hobby Lobby, JoAnn’s, and Michael’s. However, I also found some items at Amazon, Wal-mart, or Etsy. While searching for travel journals on Pinterest, I saw the cutest “You are Here” stamp. I looked absolutely everywhere for a similar one, but they were completely sold out. I was thrilled that the nice folks at Simon’s Stamps were able to custom make a similar one for me for a reasonable price.
Binder. After looking at some different Smash Books and Scrapbooks, I ultimately decided to go with this customizable 3-ring binder that I ordered on zazzle.com. I then used a three-hole punch to punch holes in some Kraft paper cardstock to use as the pages.

I actually found that I was able to be much less of a perfectionist creating this book than I am creating more formal scrapbook or Shutterfly albums. I didn’t work on the book everyday, I would just catch up whenever I felt like it, sometimes that was in the hotel if my husband was watching something that did not interest me. Mostly, though, I worked on the road which was a nice distraction since we were sometimes on the road for several hours per day.
My biggest splurge was definitely an Instax printer which was a birthday gift from my husband. I chose it over the Instax camera because it is small. Plus, when you take a photo with the Instax camera, that is the photo that you are going to get, good or bad. The printer gives you the option to choose a photo from your iPhone and even edit it before printing, if you want. I had an instant camera in the 1980s, I wanted every shot to be good and choosing the printer helped me to do that.

You need to have a Wi-Fi connection, so I always printed my photos in the hotel at night. It is actually quite simple to use. You will need to download the Instax Share app onto your phone and insert the batteries and film into the printer. Here is how to print a photo from your phone:
- Crop/edit the photo that you want to print and save it on your phone before opening the Instax app.
- Turn on your Instax printer.
- On your phone, choose Settings->Wi-Fi and choose Instax when it comes up under “Choose a Network”. You will need to repeat this anytime the printer has turned off, even briefly.
- Open the Instax Share app on your iPhone.
- Select, “Choose from Photos”
- Select the photo that you want to print
- If preferred, choose edit to rotate the photo, edit text or apply filters (optional)
- Select Connect and Print.
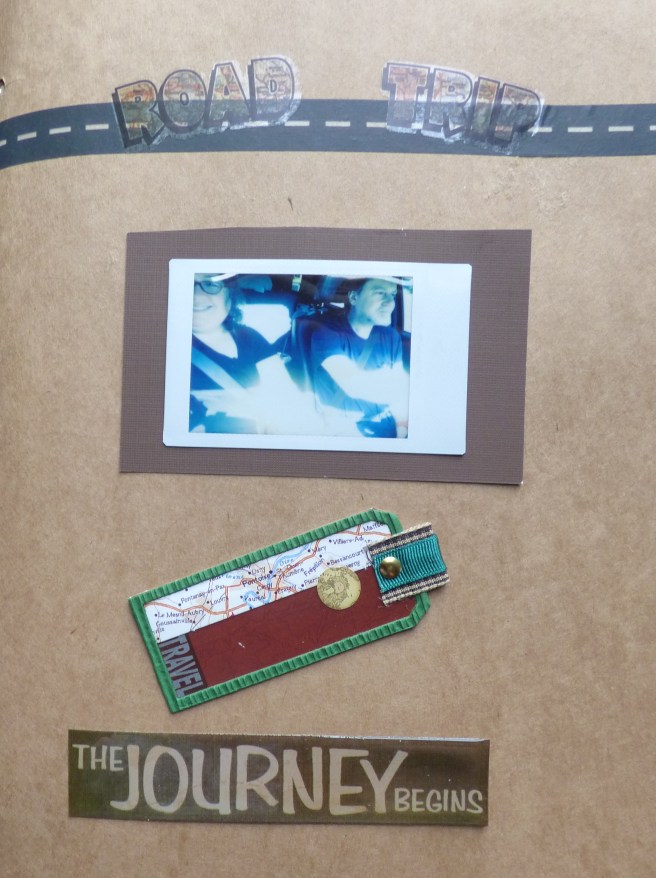
The phone will tell you how much film you have left. The power shuts off pretty quickly after printing. The quality is fairly good, but not perfect, it definitely has that old retro vibe, as you can see in the upper right of this layout.
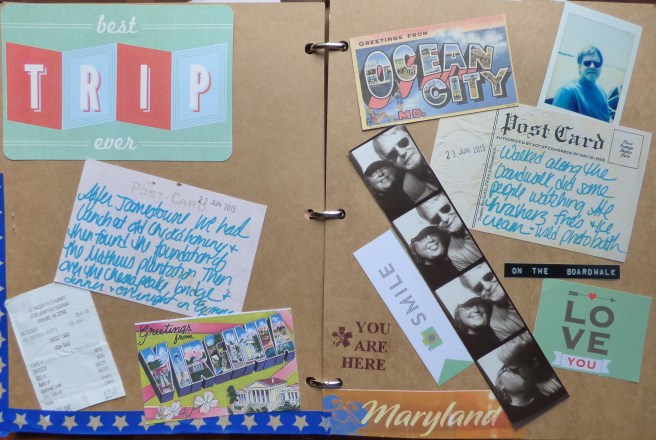
The washi tape came in handy for a variety of purposes, but I especially loved using it to make pockets with a half piece of cardstock.
My husband was not happy about my decision to buy a selfie-stick, but we usually come back from vacations with almost no photos of the two of us together. It’s important to me to have photos like that because the memories are the best part of a vacation!

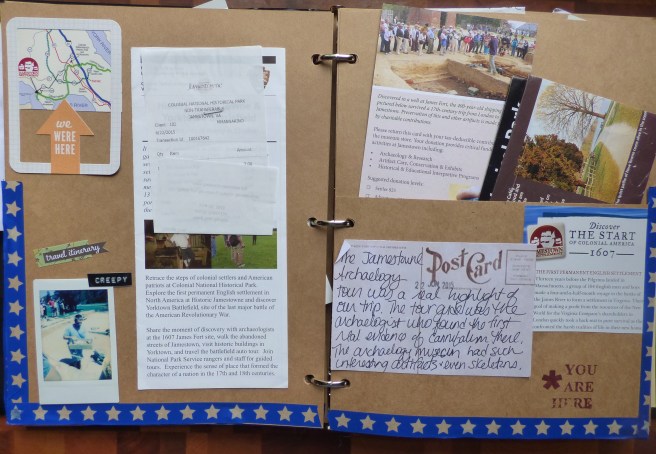
I brought along a manila envelope and, as we visited different places, I would put brochures, maps, and other scraps into it until I could cut them up and glue them onto the pages.
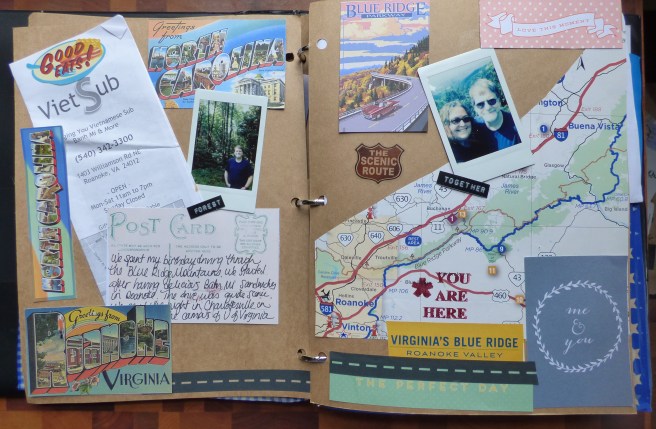
I was going for an old-fashioned, retro vibe in this book, so I found a lot of old blank postcard printables on-line before we left and printed them on cardstock to use as journaling cards. To go with them, I searched google images for retro postcards of the places we would be visiting and then printed those out to use on my pages. I also like the look of these a lot more than the overpriced postcards that we found in shops along the way.
I probably should have spent more time journaling, but these postcards that I wrote out were more journaling than I have ever taken the time to do on a vacation, so this was an accomplishment for me! If you are reading these journals, you might want to know that I am a genealogy nut and we were stopping at some of our ancestors graves along the way. Or, as my husband joked, visiting my “dead kin”.

I also had fun using my “You are here” stamp, old school embossing label maker, and the fun embellishments that I brought along to enhance each page.
I hope that you found some ideas to help you preserve your memories, even while you are in the midst of making them! Happy travels!
