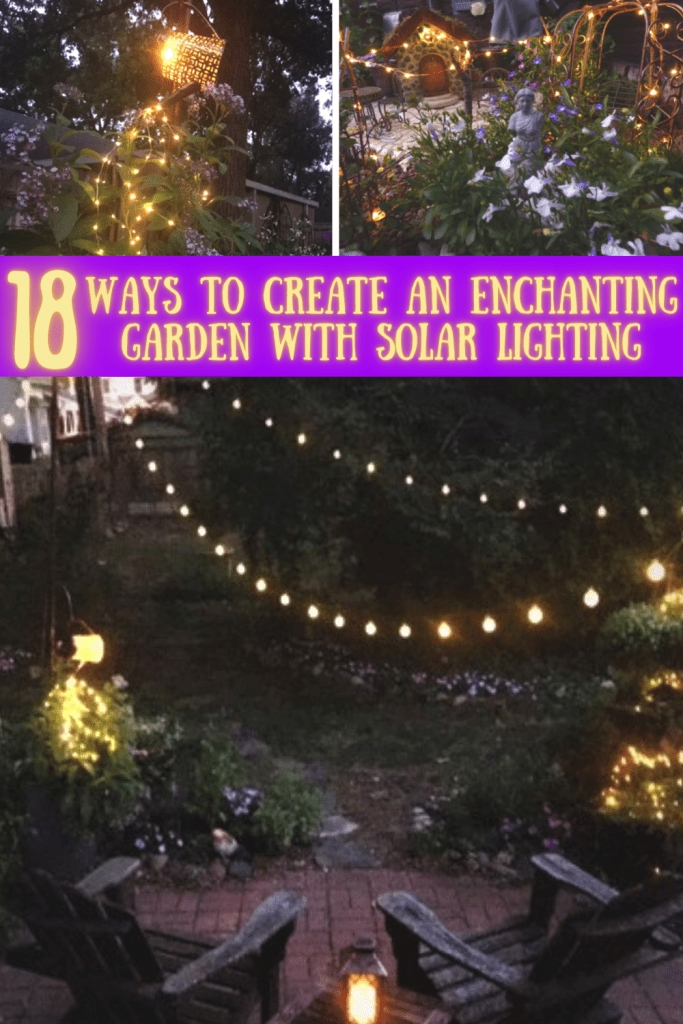
The options for lighting your garden at night are practically endless and so much more affordable than hiring an electrician to install lighting. Plus, what is more environmentally friendly than decorating with solar lights? Keep reading for 18 ways to add enchantment to your garden with solar lighting.
Over a patio. Stringing solar lights over your patio provides a cozier feel, almost as though you are being protected by a roof. To simplify this project, attach lights to the house, but also to 10′ copper pipes stuck in the ground. Copper pipe is decorative and can be stabilized by fitting it over some rebar pounded into the ground. Or, another possibility is putting the pipe in a tall planter that has a 5-gallon pot with gravel in it. Soil and plants can then be placed above the bucket. An S-hook is inserted at the top of the pipe to hang the solar light. Here I used these solar ball lights which have even held up over two winters. If they do every need to be replaced, I want to try these celestial lights over the patio next time.
Add a lantern. A solar lantern can be added to a tabletop or hung from a higher point, such as an arbor or plant hanger. This firefly lantern might remind you of summer evenings spent catching fireflies.
Fairy Garden. Nothing makes a garden magical like adding solar lights to your fairy garden.
“Water” your plants with solar lights. One of my favorite changes to my garden last year was the addition of this solar watering can which is “watering” my heliotrope plant.
Highlight an urn or fountain. To highlight a focal point in your garden, consider a spotlight, either a warm white or these colorful solar lights which change colors, adding interest.
Container stake. Add some whimsy to your favorite containers by adding a decorative solar stake. This moon and stars pack could be used in a trio of containers.
Lining a bed. To highlight your garden plantings at night, consider solar lights edging your garden beds. These tulip lights can be directed downwards highlighting your favorite plants. Here is a similar style in my garden.
Lining a pathway. These stake lights will illuminate your path when you walk through the garden at night or perhaps coming home after a late night. These celestial lights will even reflect moons and stars.
Focal point. If you are looking to add a major wow factor in your garden, consider making solar lights the focal point. Some examples include this willow tree, this moon, a peacock, or allow this whimsical fish to swim through your flowers.
Tabletop lighting. Add a centerpiece or group a solar light with other decorations at night. This lotus lamp is especially lovely.
Interspersed with your flowers. Since regular plants cannot be seen at night, “plant” some solar flowers like sunflowers or tulips. Similarly, add decorations such as these firework stakes.
Floating. If you have a pool or small pond, there is a wide array of light choices. Perhaps these floating lanterns or balls would be the perfect touch to enjoy your water feature at night.
As post caps. If you are looking to light up your entire garden, consider adding post caps to your fence posts. They come in tremendous range of prices and styles.
Inside a shed or greenhouse. Do you have an outdoor structure that doesn’t have electricity? A solar panel outside the structure can easily be connected indoors to light your tasks at night. Just use this solar shed light.
Doorway. If you have an exterior door without lighting, a simple hanging solar light will help you find your keys or the doorknob after dark.
Some posts on this site include affiliate links. If you click on a link and make a purchase, we may earn a small commission at no extra cost to you. Please know that the opinions expressed are entirely our own.
If you are like me, a visit to a garden nursery can easily be an expensive outing. To create the garden of my dreams, it took both patience and thoughtful choices to get the most from my gardening dollar.
ACQUIRING PLANTS
Of course, you are most likely to spend most of your money at the garden nursery and there are many opportunities to save money while getting the plants you love.
Buy containers with multiple plants. By examining plants carefully, you will find some containers have 2-3 plants when other containers of the same plant only have one. This is especially common with vegetables like tomatoes, peppers, cucumbers, squash, and melons. When you buy a container with more than one of these types of plants, you can VERY carefully separate the roots and then plant the vegetables separately. See this marconi pepper? Maybe 25% of the containers that I looked at had two plants, but I looked them over carefully and walked away with two plants instead of only one.
Buy plants that are easily divided after purchase. Similarly, there are some plants which root along the surface of the container. If a thick enough mat forms, you can divide these plants into two or sometimes even more pieces with a pair of scissors. Some examples of plants for which this works include Creeping Jenny and dichondra. Select your plants carefully since some plants will have a thicker mat. Since you are destroying some of the roots, it helps to then cut the plant back by about a third. Similarly, if you inspect the base of a Dracaena spikes plant, you will see that some have divided into two parts that can be separated into more than one plant
The silver dichondra, Dracaena spikes, and yellow-green creeping Jenny in these photos were divided upon purchase to create more plants.
.
Select annuals that will bloom all summer. Where I live, the summers get so hot, that certain plants peter out. Therefore, one way to save money is to mostly select annuals that do well in heat. See 10 Container Flowers that Bloom All Summer
Make the most of sales. The nurseries in my area have flat sales every year where I can get 36 plants for about $13-15 per flat. The selection is not great, but it is a good opportunity to stock up on 4 flats of impatiens which I use to provide the foundation for the more interesting plants that I grow. Having so many of the same plant also provides nice repetition throughout the garden, a core tenet of design. Even if your area doesn’t have flat sales, you can often buy similar types of plants at hardware stores. In addition, premium annuals often go on sale at a deep discount after 4th of July. You could buy a plant, enjoy it for about six weeks or so and then take cuttings to overwinter, assuming it is the type of plant for which this might work. To make this most of the sale strategy, keep records of purchases (what, where, when, and how much). If you see a good price on something you might want next year, try to take a quick note of the same information.
Don’t impulsively remove plants. When I moved into our house, there were hostas at the base of a large tree in our yard. I hate hostas and tearing those out was one of the first things I did. This ended up being a huge mistake because one plant after another failed in that spot. Eventually what did I successfully plant there? Hostas. I spent money on hostas when I could have just learned to love the free hostas that were free and growing there in the first place.
Propagating
Know which plants are best started from seed. It bothers me when I am at a nursery and see plants for sale that are very easily grown from seed and typically need to be planted in multiples. These plants include lettuce, spinach, basil, dill, parsley, beans, and peas. If you want to grow these plants, I would encourage you to consider buying seed and direct seeding them where they will grow for the season. The yield will be significantly higher than growing just one plant.
Root cuttings. Some expensive annuals can be rooted if you purchase them early enough in the season. I don’t recommend this if you need a large plant for a planter, but it can work well if a small plant will suffice. I have successfully started euphorbia cuttings in water and many others such as torenia, angelonia, coleus, and double impatiens by sticking cuttings in rooting hormone and then potting mix. Even better, take cuttings in fall and overwinter them indoors or in a greenhouse for the next season. For best success research the best propagation strategy for the plants you wish to root.
Divide your perennials. To thrive, some perennials benefit from dividing every few years. Once you have grown a plant for couple of years, you might be able to divide it to create more plants. In fact, one strategy is to buy one of several types of plants that appeal to you and then divide the plants you like and that have survived a couple of years later. Some perennials that you might like to divide are phlox, echinacea, yarrow and salvias. Many gardeners do not especially enjoy this task, so you might be able to score some free plants by dividing your friend’s or neighbor’s perennials such as salvia, echinacea, daylilies, and hostas. You might also keep an eye on social media, Craig’s list and Freecycle for offerings of free divisions.
Phlox, echinacea, salvia, and yarrow are plants that can be divided after growing for a few years.
Create new plants through layering. Dividing plants can be more work. First, they need to be dug up which isn’t too bad, but then those perennials need to be consistently watered the rest of that season. One way to get around this is to look for places where certain plants might have created new roots at an edge allowing you to cut a piece off with a sharp shovel and plant it elsewhere. You can even encourage this by cutting the leaves and piling some soil around the base of a plant. Some examples of plants that naturally layered for me include clematis, hydrangea, and vinca. I also was able to encourage this by taking the leaves off some clematis vines at the base and then using a garden staple to attach the base of the vine to the ground and covering up the base with some soil. Next year, I had a nice root that could be transplanted elsewhere. (photo of hydrangeas). To learn more, research layering.
Annabelle hydrangea and clematis are two plants which I have been able to multiply through layering. This has always been unplanned.
Save kitchen scraps. I used to try to grow scallions from seeds, but had mixed success. Eventually, I realized that I could just plant scallions from the store if I didn’t think I was going to use them. I plant them in a windowsill over the winter. In spring, I harden that container off for a few days and then grow the scallions outside all summer. When I want some scallions, I can lift some out if I want the whites, but usually I just cut off some of the green. The green regenerates fairly quickly. Although I have read in several places that it is not recommended, I have also successfully grown potatoes that sprouted.
Scallions transplanted to an indoor container for winter.
Preparing for Next Season
Save seeds. Certain plants are easy to save seeds from, but be sure to save seeds from open-pollinated plants, not hybrids. Just a few examples are certain varieties of tomatoes, peppers, peas, and beans. You might even be able to trade seeds with other gardeners.
Among many other possibilities, peas eggplant, tomatoes and cosmos are all good candidates for saving seeds.
Save small potatoes to grow next year. Every fall, when harvesting potatoes, I save the very smallest in a paper bag in a cool spot of my basement. Those potatoes sprout and grow stalks during the winter. As early as recommended the next spring, I very carefully plant those potatoes trying not to break the stalks.
Overwinter your favorite plants. If a plant is expensive, it might be worth trying to overwinter at least once just to see what happens. Certainly some plants are easier to overwinter than others. Without a doubt, I have had the greatest success with geraniums. One winter, I planted them in a window in my basement and forgot about them for months. To my great surprise, they were green when I found them and grew well after hardening off. I have also had success with euphorbia, double impatiens and heliotrope. You might do best if you take cuttings and grow them for a while outside in the fall before bringing the cuttings in.
This heliotrope plants cost a fair bit, but overwintering it means I only needed to make the purchase once.
Wintersowing. Without a doubt, one of the least known, least expensive, and greatest ways to create new plants is through wintersowing. Sometime after December 21, but before it gets too warm in the spring, you can sow seeds in moist soil in clear covered plastic containers such as the containers in which you might buy spinach or gallon milk jugs. The containers are then placed outdoors and, when conditions are right, the seeds will sprout. I usually only need to water these containers every few weeks at most when I see there is no more condensation on the lid. This method works well with many seeds, but I have the most consistent success with these seeds: kale, cosmos, sunflowers, zinnias, gomphrena, bachelor’s buttons, calendula, parsley, dill, and chamomile.
EVERYTHING ELSE
Reuse. Don’t throw things away without considering how they can be reused in your garden. A watering can that leaks can be reused a planter. The plastic labels that come in containers can be reused in next year’s containers by writing the name of a plant in permanent marker. Containers can be used to sow seeds next year. Newspapers and fleece can be used as capillary matting to keep plants moist. Cardboard and newspapers can be laid on the ground as a weed barrier.
Use yard waste. In addition to using yard waste to create compost, yard waste such as untreated lawn clippings and chopped dry leaves can be used as mulch.
Research inexpensive fertilizers and herbicides. Before spending a lot of money on fertilizers and herbicides, research lower-cost alternatives such as using diluted vinegar to kill weeds and crushed egg shells to fertilize. The list of possibilities is practically endless. Coffee grounds can be worked into the soil of plants that need acidity such as blueberries and might even benefit lettuce. Kitchen scraps can also be used to make compost. Compost can be used to make compost tea to fertilize plants.
Think outside of the box when solving problems. Coir liners are quite expensive, but often burlap bags will work in the same situations. Small mesh trash cans from the dollar store can be turned upside down as an inexpensive way to protect plants from rabbits.
Utilize an automatic watering timer. Without a doubt, the thing that has saved me the most money is finding a way to keep my garden watered, especially once the summer heats up and missing even one watering can mean the end of your plants. Therefore, some kind of automatic watering system is essential. This is one area where a splurge makes sense because it will save you money in the long run. You can buy timers that water only one zone, but a timer that waters multiple zones is ideal for individualizing your watering. For instance, you can have a zone for vegetables, one for bedding plants, and one for containers. Best of all, you can go away on vacation without needing to find somebody to keep your garden watered.
Utilize drip irrigation. Like buying an automatic timer, drip irrigation is also an investment. However, it also saves money because you can better direct irrigation towards the roots of your plants which means they require significantly less irrigation overall. You can also better individualize the amount of water each plant gets. Best of all, it is not nearly as difficult as it might seem. To learn more about drip irrigation, please see The Beginners Guide to Drip Irrigation.
If you are starting your first garden, you may be tempted to just buy the plants that most speak to you, either due to their beauty or the food they produce. You may think it is just a matter of buying what you like, planting, then keeping things watered. In actuality, for most of us, our gardens are never done. Every year is a chance to learn and improve our gardens. Therefore, the final tip is directed at you perfectionists out there. Try to enjoy the gradual process of curating your favorite plants over time and watching your garden evolve.
When I first started gardening, I chose flowers ENTIRELY based on looks…I was so superficial back then. I scoffed at those who bought petunias. They were so boring.. I was only going to plant the less common flowers. No impatiens for this girl! So, I planted those unusual flowers. Some of them made it and some of them didn’t. At first I thought it was due to my inconsistent watering. After I improved my watering by using drip irrigation (see here), I realized that it hadn’t been just my poor caretaking, it was also my flower choices. Turns out, the flowers that I so readily scoffed at were probably so common because they were much easier to grow than the flowers I was choosing.
Cool-Season Annuals. I realized that I was wasting a lot of money buying plants that didn’t have much of a chance where I live, so I started making a list of the flowers that I bought in the spring and then taking an inventory in August to see what was still blooming. If a plant didn’t make it to August for two consecutive years, it was downgraded to a “maybe” plant. I didn’t want to completely stop buying all of the flowers that petered out in the heat, because that would mean giving up some of my favorites. Instead, I bought very limited quantities of flowers such as alyssum, pansies, and lobelia and planned for their demise. In other words, during the spring, I would enjoy these short bloomers next to longer-blooming flowers. Once they died or flowering slowed considerably, I would pull them out to make additional room for the flowers that had proven to be longer blooming. Another option is to wait for cooler weather in the fall when these flowers may bloom again.
Heat Tolerant, but Require Deadheading. I also noted that, for some flowers, it wasn’t about the heat. For instance, geraniums and marigolds do well in the heat, but they require deadheading to keep blooming. I began to also limit these to small quantities, no more than I was willing to deadhead. Similarly, Cosmos and Zinnias do well in the heat, but require deadheading to keep blooming. For these, the solution was a cutting garden, the frequent cutting of flower bouquets means an abundance of these flowers for most of the summer.
My Top Ten. The ten cottage annuals chosen for this list do well in containers, even when temperatures top 100 degrees. They do not require deadheading, although a few will benefit from being cut back by half midway through the summer. I usually do this shortly before we go on vacation. We return to find the flowers blooming even better than before they were cut back.
Torenia. It is a mystery to me why torenia, also known as wishbone flower, is not more widely grown. It is incredibly adaptable, doing well in both sun and shade. Heat doesn’t seem to affect it one little bit, it just keeps on trucking. I now only buy the Summer Wave series from Proven Winners. Any other cultivars have been a disappointment. The above photo was taken of two Violet Torenia plants and one double impatiens, midway through the summer; they were even larger by fall.
Euphorbia. These tiny white flowers that resemble baby’s breath are a versatile filler in both sun and shade. Don’t over water, it is drought tolerant. Euphorbia is exceptionally easy to take cuttings from and some also overwinter this plant indoors. “Diamond Frost” is a favorite.
Petunias. Petunias are known as a flower for full sun, but in my area, they seem to do well even in partial shade. Although deadheading may increase the number of blooms, I find it sufficient to cut them back about halfway once in the middle of summer. Petunias seem adaptable to a variety of watering conditions. They come in a rainbow of colors, but I am partial to the pink and purple varieties. If I could afford to do so, I would love to buy dozens of the expensive cultivars, but I am always satisfied with the less expensive plants that I buy in six packs.
Angelonia. Also known as Summer Snapdragon, Angelonia requires full sun and is fairly drought tolerant. Most varieties grow over one foot tall. It is sometimes helpful to cut these back once during the middle of summer. The Serena series is grown from seed and easiest to find, but I prefer Proven Winner’s Wedgewood Blue when I can find it.
Bacopa. The little white flowers of this delightful plant continue to bloom in part shade to full sun, as long as they are not allowed to dry out. If blooming slows, cut back once about halfway during the summer. Bacopa drapes beautifully over the side of a planter. In addition to this white, it also comes in pink and purple.
Double Calibrachoa in early summer.
Double Calibrachoa in late summer
Calibrachoa. Once you have grown this prolific bloomer, it is easy to see how it earned it’s nickname, Million Bells. Single Calis looks like mini-petunias, while the double Calis look like mini-roses. It comes in several colors, but I am partial to this Double Pink Calibrachoa. As pictured here, Calibrachoa fills in the planter, as well as spilling over the edge. Calibrachoa needs full sun and be careful not to over water.
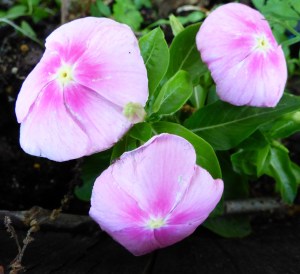
Impatiens. Of all the flowers I buy, I depend most on lovely impatiens, also known as, “Busy Lizzies”. There are now some more expensive varieties that do well in sun, but I love the inexpensive varieties that I can afford to buy by the flat to brighten up the shady areas of my garden. In recent years, I was surprised to realize that my impatiens can also do well in sun. The above variety is called Blue Pearl, although they are pink. Impatiens require regular watering.
Salvia. Although these Victoria Blue Salvia were purchased as annuals, many plants often return after a mild winter…or perhaps they just self sow. Salvia are known for their drought tolerance. Be sure to check the projected height of any salvia before purchase. Some grow too tall for smaller containers. Salvia are best in full sun, but also do well in partial shade.
Verbena. While I love the many shades of verbena, most that I have tried required some cutting back for continued blooming. Not so with these little Imagination Verbena. Verbena do well in partial shade to full sun. Although they tolerate some dry conditions, they seem to flower best when kept continuously moist. These verbena are especially useful for adding height to containers.
Vinca. As a beginning gardener, I could not tell the different between impatiens and Vinca to save my life. Even today, I pay more attention to the foliage, than the flower. Vinca, also known as periwinkle, does well in full sun and is fairly drought tolerant. For me, the plants stay relatively small, but still provide a nice pop of color.
Honorable Mention: The following flowers also do well in heat and do not require deadheading: Pentas, Lantana, Scaevola, Begonia, Moss Rose.
Spend less time deadheading and more time relaxing in your garden.
I enjoy growing flowers, herbs, vegetables, and fruit, but my favorite yearly project is always my fairy garden. One year, I was installing solar twinkle lights over an arbor and I thought it might be pretty if I could do the same to the arbor in my fairy garden.
PREPARATION
Here is a list of the materials you need
Large container with drainage holes (e.g., half whisky barrel, wheelbarrow, tub)
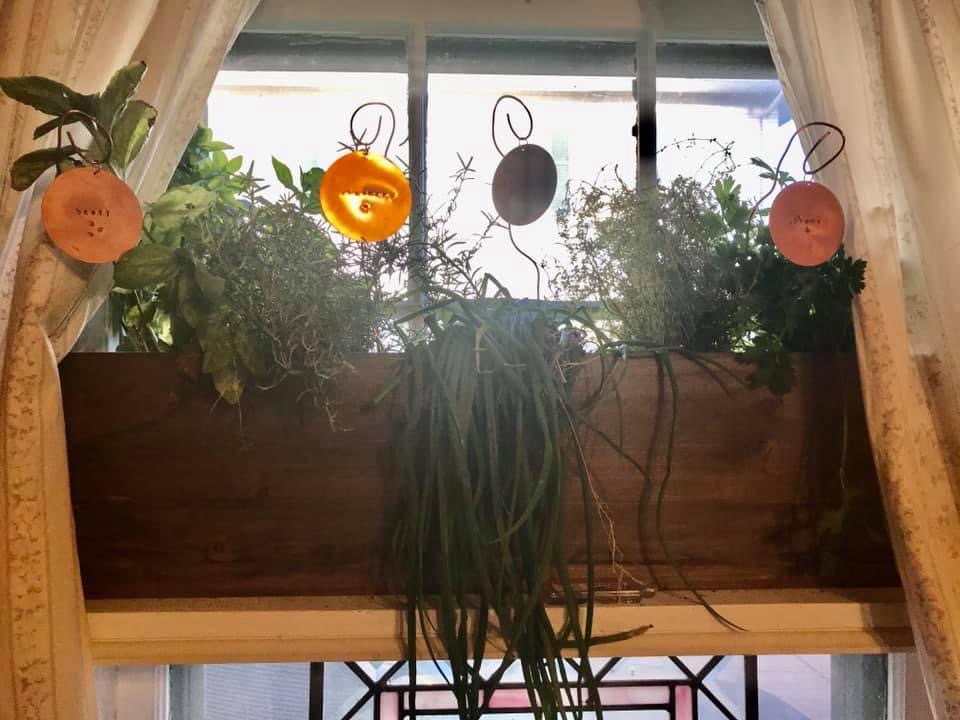
I initially started with solar lights that looked a lot like the lights you might use at Christmas. However, I later switched to these solar LED wire string lights and they have been going strong for months now. I actually have found all kinds of garden uses for these and even have some inside some windows in my house to brighten things up when the sun goes down early in the winter. I especially love these pink solar lights that intermingle with my culinary herbs inside my kitchen window.
The ones that I bought had 100 lights on the string. That may seem like a lot, but I thought it was just right. Here is what they look like when they first arrive:
Once you have all of your materials, fill the container with potting soil until it is just a few inches below the top. You will fill it to the top later when you are almost done. Lay out all of the larger structures and plants until you have a general idea of where you want everything to be. You will then need to move some items in and out while you install the irrigation and lighting.
IRRIGATION
It is not required, but if you live somewhere hot and dry like me, you might need to water as much as twice a day unless you are using a drip system. I use drip irrigation on a timer for all of my containers, and I first started with a Drip Irrigation Kit for Containers which are quite easy to use. This kit would water several containers, not just your fairy garden. For more information about drip irrigation, please see The Beginner’s Guide to Using Drip Irrigation in your Container Garden.
With that said, drip irrigation is a must if you want to successfully grow plants in miniature containers like these in a hot climate. I insert an emitter directly into the bottom of the planters and urns. This takes some fiddling around to get it right. I also arrange one emitter such that it will drip into the little pond and therefore stay full of water all summer. Garden staples are helpful in getting the drip irrigation installed if you want to do some of these extras. For more information on this, see 6 Creative Uses for Drip Irrigation .
LIGHTING
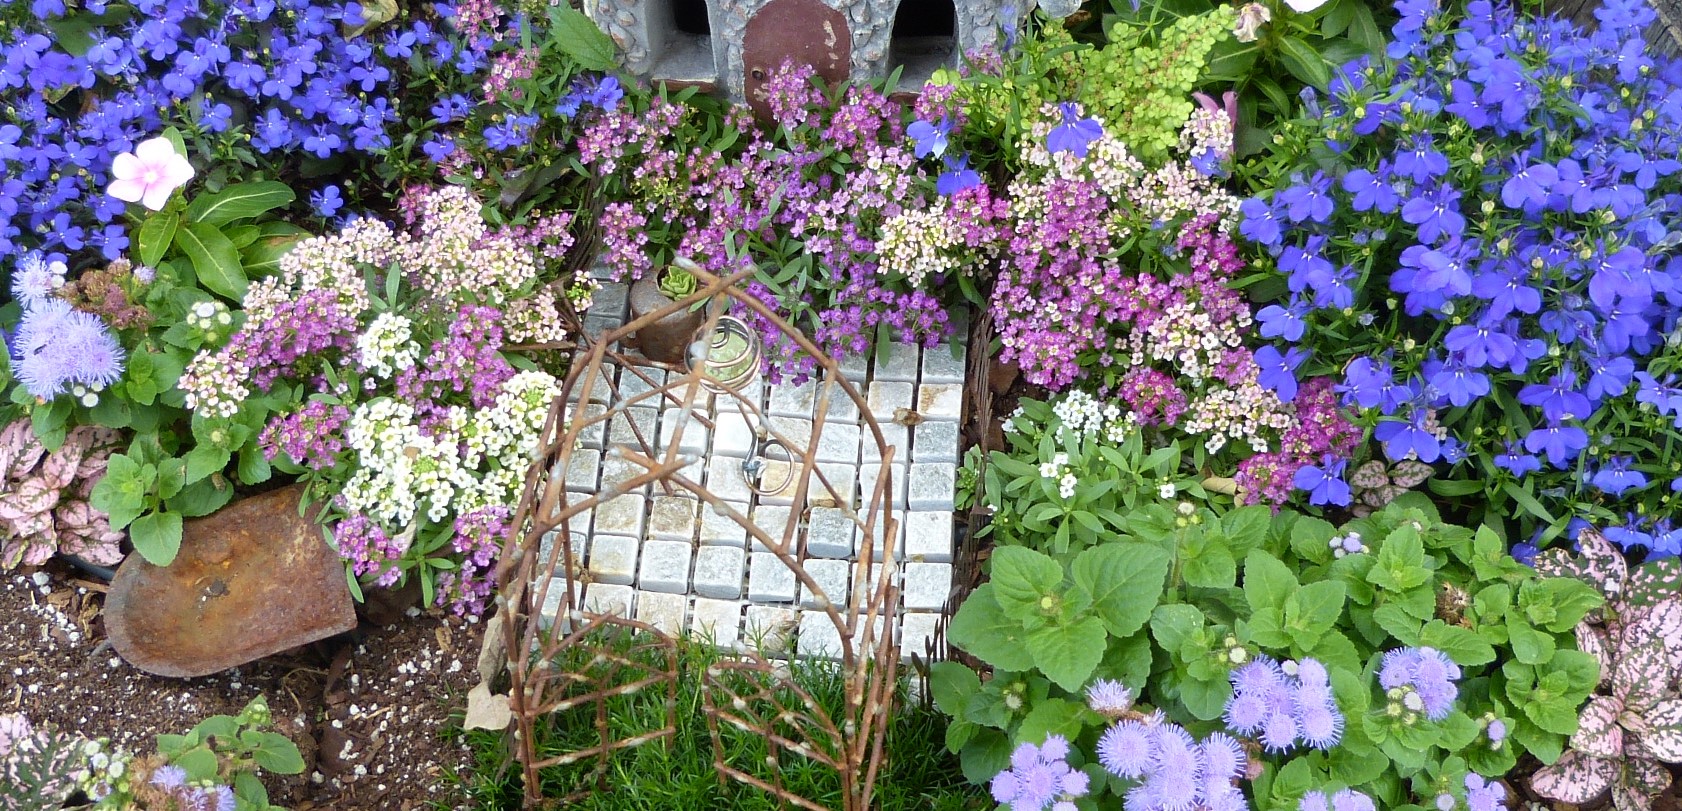
Install the solar string lights starting at the end nearest the solar panel. Unfortunately, the lights are kind of far apart, so it is sometimes necessary to twist or loop the wire around so that the lights are closer together. I like using the lights in a way that you cannot see a continuous string of lights. Instead, some are hidden under plants or gravel such that the lighting appears to start and stop in different places. This year, I added solar light strings over a “patio”, which is really an old mosaic stepping stone.
When I’m done, any leftover lights are placed in the house so it looks like the fairies are at home.
PLANTING
Place your plants a little above the soil line, remember that you will add the rest of the soil later.
I especially like alyssum (pink) and lobelia (bright blue) because I can buy them quite reasonably at a flat sale every year. These light blue ageratum are also nice, but only when they are planted towards the very back because they get tall.
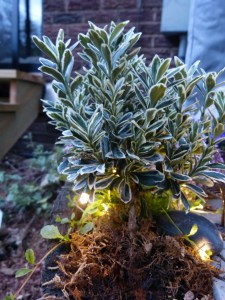
Some kind of miniature tree is also a nice addition. My favorite is this mini variegated olive.
I use Wire Vine over the arbor (left) and Isotoma Laurentia (right) which has tiny little blue flowers. These two plants are great because they often come back after a mild winter.
If you want a vegetable garden, simply break the tips off the branches of succulents and place them in the soil to mimic tiny cabbages. They will eventually take root, needing only a little water.
Lastly, I use some premium annuals such as Baby’s Tears (left) or Leptinella (center) which looks like tiny fern plants. I also like Irish moss (right) because it looks so much like grass.
Once the plants are planted, add a couple inches of soil to the top covering the drip irrigation and solar lighting. Add some rocks for decorations or paths. Here is a path made of expanded shale.
Add fun little extras (e.g., furniture, fencing, decorative stakes, etc). I have a lot of trouble restraining myself on this step. I really tend to junk it up! For me, that is part of the fun.
MAINTAIN
Keep the garden watered and cut plants back by half when they get tall or scraggly, which is what happened here..
I hope that you enjoy creating your own magical fairy garden!
Some posts on this site include affiliate links. If you click on a link and make a purchase, we may earn a small commission at no extra cost to you. Please know that the opinions expressed are entirely our own.


 Torenia. It is a mystery to me why torenia, also known as wishbone flower, is not more widely grown. It is incredibly adaptable, doing well in both sun and shade. Heat doesn’t seem to affect it one little bit, it just keeps on trucking. I now only buy the Summer Wave series from Proven Winners. Any other cultivars have been a disappointment. The above photo was taken of two Violet Torenia plants and one double impatiens, midway through the summer; they were even larger by fall.
 Euphorbia. These tiny white flowers that resemble baby’s breath are a versatile filler in both sun and shade. Don’t over water, it is drought tolerant. Euphorbia is exceptionally easy to take cuttings from and some also overwinter this plant indoors. “Diamond Frost” is a favorite.
 Petunias. Petunias are known as a flower for full sun, but in my area, they seem to do well even in partial shade. Although deadheading may increase the number of blooms, I find it sufficient to cut them back about halfway once in the middle of summer. Petunias seem adaptable to a variety of watering conditions. They come in a rainbow of colors, but I am partial to the pink and purple varieties. If I could afford to do so, I would love to buy dozens of the expensive cultivars, but I am always satisfied with the less expensive plants that I buy in six packs.


")


